XC7Z030-1FBG676C Troubleshooting Guide: Common Problems and Solutions
Having issues with the XC7Z030-1FBG676C? As a hardware engineer, there's nothing more frustrating than a complex System-on-Chip (SoC) that isn't behaving as expected. The Xilinx Zynq-7000 series, including the powerful XC7Z030, integrates an ARM-based processing system (PS) with programmable logic (PL), creating a flexible but intricate device. This guide cuts through the complexity, covering the most common problems hardware engineers encounter during board bring-up and debugging, and provides proven, step-by-step fixes based on datasheet recommendations and extensive field experience.

Table of Contents
XC7Z030-1FBG676C Quick Reference
Before diving into troubleshooting, let's establish a baseline with the key specifications for the XC7Z030-1FBG676C. Verifying your design assumptions against these datasheet values is a critical first step.
| Parameter | Value |
|---|---|
| Category | SoC (System on Chip) |
| Processing System (PS) | Dual-core ARM Cortex-A9 MPCore |
| Programmable Logic (PL) | 125K Logic Cells |
| Max PS Clock Frequency (-1 Speed Grade) | 667 MHz |
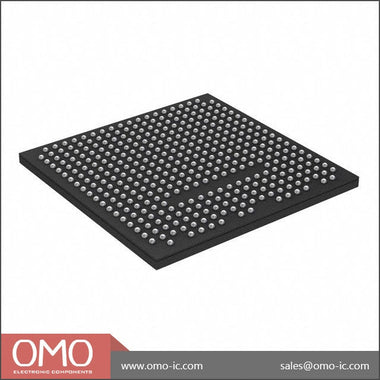
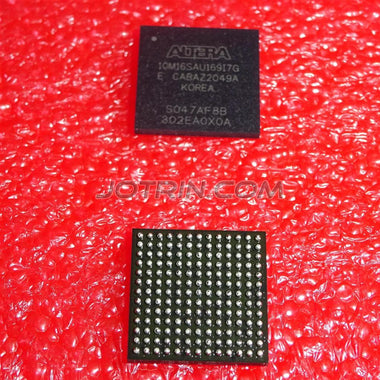
| Package | 676-ball Fine-Pitch BGA (FBG676) |
| Operating Temperature Range (Commercial) | 0°C to 85°C (Junction) |
The XC7Z030-1FBG676C is a mid-range device in the Zynq-7000 family, offering a potent combination of a dual-core ARM processor and substantial FPGA fabric. This makes it ideal for applications requiring both intensive software processing and hardware acceleration. Common use cases include real-time video processing, advanced driver-assistance systems (ADAS), industrial motor control, and software-defined radio (SDR). Its strength lies in the tight integration between the PS and PL, enabling high-bandwidth, low-latency communication that is difficult to achieve with separate processor and FPGA solutions.
Common Problem #1: Boot Failure or JTAG Chain Not Detected
Symptom: The most fundamental "it's not working" problem. After power-on, the device does not boot from the selected media (e.g., QSPI flash, SD card), and/or the JTAG interface is not recognized by the Xilinx hardware tools (Vivado Hardware Manager). You may see "No devices detected on target" or similar errors.
Root Cause: This issue typically stems from one of three areas: power, clocking, or configuration mode settings. The Zynq-7000 has a specific power-up sequence, requires a stable input clock, and uses dedicated MIO (Multi-Use I/O) pins to determine its boot source.
Fix: Follow this systematic approach to isolate the failure.
-
Verify Power Supply Rails and Sequencing: The Zynq-7000 has multiple power domains that must be powered in a specific order. Refer to the "Power-On and Power-Off Power Supply Sequencing" section of the Zynq-7000 (DS191) datasheet. The general sequence is:
- Group 1: VCCPAUX (Auxiliary PS), VCCPLL (PLLs)
- Group 2: VCCINT (PL Core), VCCBRAM (Block RAM), VCCINT_IO (PS Internal), VCCO_MIO, VCCO_DDR
- Group 3: VCCAUX (PL Auxiliary)
- Group 4: VCCO (PL I/O banks)
PS_POR_B(Power-On Reset) signal; it must be held low until all supplies are stable and then de-asserted. -
Check the Master Input Clock (PS_CLK): The Processing System requires a stable clock source, typically between 30-50 MHz, connected to the
PS_CLK_INpin. Use an oscilloscope to verify the clock's frequency, stability, and signal integrity. A missing, noisy, or out-of-spec clock will prevent the internal boot ROM code from executing. -
Confirm Boot Mode Pin Settings: The Zynq device samples the state of the MIO pins
MIO[8:2]at power-on to determine the boot sequence. These pins have internal pull-ups/pull-downs, but it is best practice to use external resistors to definitively set the boot mode. For example, to boot from an SD card, you typically need to configure the MIO pins for the SDIO peripheral. Consult the Zynq-7000 Technical Reference Manual (TRM, UG585), specifically the "Boot and Configuration" chapter, for the exact pin settings for your desired boot mode (JTAG, QSPI, NAND, SD). Use a multimeter to check the voltage on these pins just before and during power-on to ensure they reflect the intended logic levels. -
Inspect JTAG Circuitry: If the device powers up but JTAG fails, inspect the JTAG connections. Ensure
TCK,TMS,TDI, andTDOare correctly routed. Check for proper pull-up/pull-down resistors (e.g., pull-up onTMSandTDI, pull-down onTCK). TheTCKsignal is particularly sensitive to reflections; ensure proper termination if the trace is long. Also, verify that the VREFP pin for the JTAG bank is connected to the correct voltage (typically 1.8V).
Common Problem #2: DDR3 Memory Instability and Data Corruption
Symptom: The system successfully boots a first-stage bootloader (FSBL) or U-Boot, but it hangs, crashes, or reports data errors when loading the operating system or running memory-intensive applications. Memory tests (like `memtester` in Linux or a bare-metal test) fail with bit flips or address errors.
Root Cause: High-speed DDR3 interfaces are extremely sensitive to physical layout and signal integrity. The root cause is almost always related to timing violations, impedance mismatches, power supply noise, or incorrect configuration in the Zynq's DDR controller.
Fix: Debugging DDR issues requires a combination of software configuration and hardware verification.
- Review Vivado DDR Configuration: The Zynq-7000 Processing System IP core in Vivado is where the DDR controller is configured. Double-check every setting against your specific DDR3 chip's datasheet. This includes memory type, speed bin, CAS latency, bus width, and timing parameters (tRC, tRAS, etc.). The Vivado tool uses this information to generate a highly specific initialization and calibration sequence. A single incorrect parameter can lead to intermittent failures.
-
Analyze PCB Layout: This is the most critical aspect for DDR stability.
- Impedance Control: Ensure that all data (DQ), strobe (DQS), address, command, and clock traces are routed with the correct single-ended and differential impedance as specified in your design rules (typically 50Ω single-ended, 100Ω differential).
- Length Matching: All signals within a byte group (e.g., DQ0-7, DQS, DQM) must be tightly length-matched. The clock and address/command lines must also be matched to the data groups according to Xilinx's layout guidelines (see UG933, "Zynq-7000 SoC PCB Design and Pin-Planning Guide"). Use your PCB layout software's tools to verify these lengths. Deviations of even a few millimeters can cause timing skew and errors at high speeds.
- Power Integrity: The DDR power rails (e.g., 1.5V or 1.35V) and the termination voltage rail (VTT, typically half the DDR voltage) must be extremely clean. Use an oscilloscope with a high-bandwidth probe to measure noise and ripple directly at the BGA balls or decoupling capacitors. Insufficient decoupling or a poorly designed power delivery network (PDN) is a common cause of elusive DDR errors.
- Run Bare-Metal Memory Tests: Before booting a full OS, use a simple bare-metal application generated by the Vitis/SDK to test the memory interface. These tests run directly on the hardware without the complexity of an operating system, making it easier to determine if the issue is purely hardware/configuration related. The "Memory Tests" application template is an excellent starting point.
- Consider Lowering the Clock Speed: As a diagnostic step, try reconfiguring the DDR controller in Vivado to run at a lower frequency (e.g., half the target speed). If the system becomes stable at a lower speed, it strongly points to a signal integrity or timing issue in the hardware that is less tolerant at higher frequencies.
Common Problem #3: AXI Interface Timeouts Between PS and PL
Symptom: The software running on the ARM processor (PS) hangs when it attempts to read from or write to a custom peripheral implemented in the programmable logic (PL). This often manifests as a kernel panic or a frozen application. Debugging may reveal that the processor is stuck waiting for an AXI bus handshake that never completes.
Root Cause: These failures are unique to the SoC architecture and usually involve incorrect AXI bus connections, clock domain crossing (CDC) problems, or logic errors within the custom PL peripheral itself.
Fix: Debugging PS-PL interaction requires deep diving into the Vivado design and using on-chip logic analyzers.
- Verify Address Mapping: In the Vivado Address Editor, ensure that the address range assigned to your custom PL peripheral does not overlap with any other peripheral. Also, confirm that the software is trying to access the exact base address assigned in the hardware design. A mismatch here is a simple but common mistake.
- Check Clocking and Resets: The AXI interfaces between the PS and PL are often clocked by different sources. The PS side is clocked by a clock derived from the PS PLLs (e.g., FCLK_CLK0), while your PL logic might run on a separate clock. If these clocks are not synchronous, you MUST use an AXI Clock Converter block or ensure your custom logic has proper CDC synchronizers on all AXI signals. Also, ensure that the reset signal for your PL logic is correctly connected and sequenced. The PL logic should be held in reset until its driving clock is stable and the AXI interconnect is ready.
-
Use the Integrated Logic Analyzer (ILA): The ILA is your most powerful tool for this problem. Instantiate an ILA core in your Vivado block design and connect it to the AXI signals of the failing interface (e.g., AXI_LITE or AXI_HP). Key signals to monitor are:
- Address channels:
AWVALID,AWREADY,AWADDR(for writes);ARVALID,ARREADY,ARADDR(for reads). - Data channels:
WVALID,WREADY(for writes);RVALID,RREADY(for reads). - Response channel:
BVALID,BREADY(for writes);RRESP(for reads).
AWVALIDbut your PL logic never assertsAWREADY, you know the problem is in your peripheral's logic that is supposed to handle the write address. This allows you to pinpoint exactly where the AXI protocol is breaking down. - Address channels:
- Start with a Known-Good IP: If you suspect your custom AXI peripheral, replace it temporarily with a simple, known-good Xilinx IP, like an AXI GPIO block. If the PS can successfully communicate with the AXI GPIO, it confirms that the overall AXI interconnect, clocking, and reset structure are correct, and the fault lies within your custom IP logic.
Systematic Debug Checklist
When faced with a non-functional board, avoid random probing. Work through this checklist systematically to ensure all foundational elements are correct before moving to more complex software or logic issues.
| Step | Check Item | Expected Result | If Failed |
|---|---|---|---|
| 1 | Power Rails | Measure all VCC/VCCO rails (VCCINT, VCCAUX, VCCO_DDR, etc.). Verify they are at the correct voltage specified in the datasheet, with minimal ripple (<5%). | Investigate the corresponding power regulator, its input, enable pin, and feedback network. Check for shorts. |
| 2 | Power Sequencing | Observe power rails on an oscilloscope during power-on. Confirm they rise in the order specified in the DS191 datasheet. | Adjust your power management IC (PMIC) or discrete sequencer's timing. |
| 3 | Reset Signal | Probe PS_POR_B. It must remain low while supplies are ramping and then transition cleanly high. |
Check the reset generator circuit. Ensure it monitors all critical rails. |
| 4 | Clock Input | Probe PS_CLK_IN. Verify frequency, stability, and signal integrity (proper voltage levels, low jitter). |
Check the oscillator, its power supply, and the connecting trace. |
| 5 | Boot Mode Pins | Measure voltage on MIO[8:2] pins at power-on. They must match the logic levels for the desired boot mode. | Check external pull-up/pull-down resistors. Look for shorts or opens. |
| 6 | JTAG Signals | Check for clean transitions on TCK, TMS, TDI, TDO. Verify pull resistors and VREFP voltage. |
Check for shorts/opens, review termination scheme, and verify JTAG pod connections. |
| 7 | DONE Pin | If configuring the PL, monitor the DONE pin. It should transition from low to high upon successful configuration. |
FPGA configuration failed. Check bitstream validity, JTAG/QSPI connection, and PL power rails (VCCINT). |
This checklist forms the foundation of any Zynq board bring-up. If you can pass all these checks, you have a high degree of confidence that the fundamental hardware is sound. At this point, issues are more likely to be found in the Vivado design, software drivers, or application code. Advanced debugging may require more sophisticated tools, but these basic steps resolve the vast majority of initial problems. For further exploration of device capabilities and potential alternatives, you can Browse Zynq-7000 Series to compare different parts within the family.
Where to Get Genuine XC7Z030-1FBG676C
In today's supply chain environment, the risk of receiving counterfeit or substandard components is higher than ever, especially for advanced SoCs like the XC7Z030-1FBG676C. A counterfeit part is not just a financial loss; it can introduce insidious, hard-to-debug failures and completely invalidate weeks of engineering effort. Counterfeits may be remarked lower-grade parts, empty packages, or silicon from a different, incompatible family. Common signs of a fake part include poor quality markings (smudged or uneven text), incorrect font or logo, physical damage, or a "too good to be true" price.
The most reliable way to avoid these issues is to source components from a trusted and traceable distributor. A reputable supplier maintains strict quality control and sourcing protocols, ensuring that parts are authentic and have been handled and stored correctly to prevent damage from electrostatic discharge (ESD) or moisture. They can provide traceability documentation back to the original manufacturer, giving you confidence in the component's authenticity and quality. While it may be tempting to source from auction sites or unvetted brokers for a lower price, the potential cost in lost time, board respins, and product failures far outweighs any initial savings. For mission-critical designs, always prioritize a secure and reliable supply chain. You can Check XC7Z030-1FBG676C Inventory & Pricing through trusted channels to ensure you receive a genuine, fully functional device for your project.
Video Demonstration
Frequently Asked Questions (XC7Z030-1FBG676C FAQ)
Why is my XC7Z030-1FBG676C not showing up in the JTAG chain?
This is a very common bring-up issue. First, physically verify the JTAG connections (TCK, TMS, TDI, TDO) and ensure the JTAG pod is powered and connected correctly. Second, check the power rails; the JTAG port on the Zynq is powered by a specific VCCO bank, which must be active. Finally, and most critically, check the boot mode pins (MIO[5:2]). If the device is configured to boot from QSPI or SD card and gets stuck trying to load a non-existent or corrupt image, the JTAG interface may become unresponsive. For initial bring-up, it is highly recommended to set the boot mode to JTAG cascade mode, which forces the device to wait for JTAG instructions immediately after power-on.
My system boots but crashes randomly. What should I check first?
Intermittent crashes often point to either a thermal issue or a signal integrity problem, most commonly with the DDR memory. First, check the device's temperature; if it's running hot, ensure your heatsink is properly mounted and the fan (if any) is operational. Overheating can cause internal timings to drift and lead to unpredictable behavior. If thermals are fine, the next suspect is the DDR3 interface. Run an extensive memory test from a bare-metal application. If it fails, you are likely dealing with a DDR signal integrity issue on your PCB or an incorrect timing configuration in your Vivado project.
How do I know if my DDR3 layout is the problem?
Confirming a DDR layout issue post-fabrication can be challenging, but there are several indicators. The most definitive is if the system becomes stable when you reduce the DDR clock frequency in the Zynq PS configuration. This suggests the layout has marginal signal integrity that fails at higher speeds. You can also use Xilinx's pre-layout and post-layout simulation tools to analyze your design, but this is a complex process. A more practical approach is to meticulously compare your layout's trace lengths, impedances, and via usage against the recommendations in the Xilinx Zynq PCB Design Guide (UG933) and the layout of a known-good evaluation board like the ZC702.
The Processing System (PS) can't communicate with my custom IP in the Programmable Logic (PL). Why?
This is almost always an AXI bus, clocking, or reset issue. First, use the Vivado Address Editor to confirm your software is writing to the correct base address assigned to your IP. Second, verify the clocking; ensure the AXI interface and your custom logic are on the same clock domain or have a proper AXI Clock Converter between them. Third, check the reset signal for your PL logic. The best way to debug this is to insert an Integrated Logic Analyzer (ILA) in Vivado to spy on the AXI handshake signals (AWVALID/AWREADY, ARVALID/ARREADY) between the PS and your IP. This will show you exactly where the communication is stalling.
What are the most critical power rails to check on the XC7Z030-1FBG676C?
While all power rails are important, three are absolutely critical for initial device operation. VCCINT supplies the core logic of the FPGA fabric, VCCINT_IO powers the internal logic of the Processing System, and VCCPAUX powers auxiliary PS blocks including the one that reads the boot mode pins. The power-on sequence specified in the datasheet (DS191) must be followed, which generally means VCCPAUX and VCCPLL should come up first. Failure to provide clean power in the correct sequence to these core rails will prevent the device from even starting its internal boot ROM code, leading to a completely unresponsive chip.