XC7A100T-1CSG324C Troubleshooting Guide: Common Problems and Solutions
Having issues with the XC7A100T-1CSG324C on your board? As a hardware engineer with over 15 years of experience in board bring-up and system design, I've seen my share of FPGA-related headaches. The Xilinx Artix-7 series, including the powerful XC7A100T, is generally robust, but its complexity can lead to frustrating problems that halt development. This guide is designed for engineers and technicians, covering the most common problems encountered in the lab, from configuration failures to unexpected thermal behavior. We'll provide proven, step-by-step fixes based on datasheet recommendations and hard-won field experience.

Table of Contents
XC7A100T-1CSG324C Quick Reference
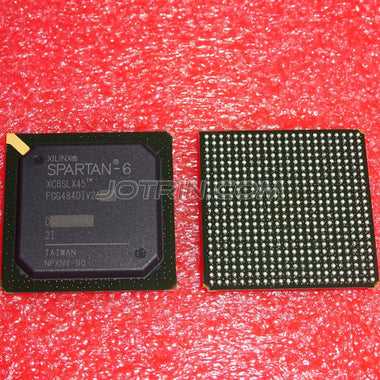
Before diving into troubleshooting, let's establish a baseline of the device's key characteristics. The XC7A100T-1CSG324C is a mid-density FPGA from the Xilinx (now AMD) Artix-7 family, balancing performance, power, and cost. It's frequently used in applications like software-defined radio, machine vision, and industrial control. Understanding its core specifications is the first step in diagnosing any issue.
| Parameter | Value |
|---|---|
| FPGA Family | Artix-7 |
| Logic Cells | 101,440 |
| CLB LUTs | 63,400 |
| Total Block RAM | 4,860 Kb |
| DSP Slices | 240 |
| Package | CSG324 (15x15mm) |
| Speed Grade | -1 (Commercial) |
| Core Voltage (VCCINT) | 1.0V (Nominal) |
| Junction Temperature (Tj) | 0°C to 85°C |
This device is housed in a 324-pin Chip Scale BGA (CSG324), which requires precise PCB layout and assembly. Its performance is characterized by the -1 speed grade, and it operates within the commercial temperature range. The core logic runs at a nominal 1.0V, with auxiliary and I/O voltages having their own specific requirements. Any deviation from these core parameters is a primary suspect in troubleshooting scenarios.
Problem #1: Configuration Failure (DONE Pin Stays Low)
Symptom: After power-on, the FPGA fails to load its bitstream from the configuration memory (e.g., a QSPI flash). The most telling sign is that the dedicated DONE pin remains at a logic low level, and the FPGA is non-functional. The INIT_B pin might also be stuck low.
Root Cause: This is the most common board bring-up issue. It can be caused by a multitude of factors: incorrect power sequencing, improper configuration mode settings, issues with the configuration clock (CCLK), a faulty or unprogrammed configuration flash, or even a design error in the bitstream itself.
Fix: Follow this systematic approach to isolate the cause:
-
Power Rail Verification: FPGAs are extremely sensitive to power. The Artix-7 has a specific power-on sequence requirement. According to the datasheet (DS181), VCCINT and VCCBRAM should ramp first, followed by VCCAUX, and finally the VCCO rails for the I/O banks.
- Use an oscilloscope to probe each power rail (VCCINT, VCCAUX, VCCOs) directly at the BGA's decoupling capacitors. Do not measure at the voltage regulator output, as PCB trace impedance can cause significant voltage drop.
- Confirm that VCCINT is a stable 1.0V, VCCAUX is a stable 1.8V, and your VCCO rails match their intended levels (e.g., 3.3V, 2.5V).
- Check for excessive ripple. High ripple can cause the internal Power-On Reset (POR) circuit to fail, preventing the configuration sequence from starting.
-
Status Pin Inspection:
- INIT_B Pin: This open-drain pin signals the FPGA's health. After power rails are stable, it should be released and pulled high by an external resistor. If INIT_B is stuck low, it indicates a critical error, often related to power integrity, a CRC check failure during bitstream loading, or an internal device fault. Re-check all power rails and ensure your bitstream is not corrupted.
- PROGRAM_B Pin: This active-low input initiates configuration. It should be held high during normal operation. If it's floating or tied low, the FPGA will be held in a reset state. Probe it to ensure it's at a logic high. You can manually pulse it low to trigger a new configuration attempt.
-
Configuration Mode Pins (M2, M1, M0): These pins determine how the FPGA attempts to load its bitstream (e.g., Master SPI, Slave Serial, JTAG).
- Consult the Artix-7 configuration user guide (UG470) for the correct logic levels for your desired mode. For Master SPI from a QSPI flash, the typical setting is M[2:0] = 001.
- Physically verify the pull-up/pull-down resistors on these pins on your PCB. A common assembly error is incorrect resistor values or missing components.
-
Configuration Clock (CCLK): In Master configuration modes, the FPGA generates CCLK to read the bitstream from the flash.
- Probe the CCLK pin after pulsing PROGRAM_B. You should see clock activity. If there is no clock, it points back to a power or mode pin issue.
- If there is a clock but the DONE pin never goes high, the issue may be with the data lines (MOSI/MISO) to the flash memory or the flash device itself (wrong part, not programmed, or damaged).
Problem #2: JTAG Chain Not Detected in Vivado
Symptom: When you connect your JTAG programmer (e.g., a Xilinx Platform Cable USB II) and attempt to auto-detect devices in Vivado's Hardware Manager, the tool reports "No devices found" or shows an incomplete chain.
Root Cause: JTAG is a simple serial daisy-chain protocol (TDI -> TDO), but it's notoriously easy to get wrong. Common causes include incorrect wiring, a broken chain, incorrect VREF voltage for the JTAG pod, signal integrity issues on the JTAG lines, or another device in the chain holding the bus in an invalid state.
Fix: Debugging a JTAG chain requires methodical continuity and signal checks:
- Check VREF: The JTAG programmer needs a voltage reference (VREF) from the target board to set its I/O voltage levels. This pin on the JTAG header must be connected to the VCCO of the FPGA bank that contains the JTAG pins (TCK, TMS, TDI, TDO). For the XC7A100T-1CSG324C, these are typically in a bank powered by 1.8V or 2.5V. If VREF is not connected or connected to the wrong voltage, the programmer cannot communicate with the FPGA. Measure the VREF pin on your JTAG header to confirm it's at the expected voltage.
-
Verify the Daisy Chain: The JTAG chain is formed by connecting the TDO (Test Data Out) of one device to the TDI (Test Data In) of the next.
- Start with a schematic review. Trace the path: JTAG Connector TDI -> First Device TDI -> First Device TDO -> Second Device TDI -> ... -> Last Device TDO -> JTAG Connector TDO.
- Use a multimeter in continuity mode to physically buzz out the connections on the unpowered board. Check for continuity from the JTAG header pin to the corresponding FPGA ball, and from the TDO ball of one device to the TDI ball of the next. A single open or short will break the entire chain.
-
Signal Integrity and Termination:
- The TCK (Test Clock) signal is the most sensitive. While JTAG can run slowly, long traces or stubs can cause reflections. The Artix-7 configuration user guide recommends a weak pull-down resistor (e.g., 4.7kΩ) on TCK and TMS, and a pull-up on TDI and TDO, placed near the FPGA. Verify these are present.
- If your JTAG clock speed is adjustable in the programming tool, try reducing it to the lowest possible frequency (e.g., 1 MHz). A slower clock is more tolerant of signal integrity issues and can help you establish a connection.
- Isolate the Problem: If there are multiple devices in your JTAG chain, try to isolate the FPGA. If possible, use jumpers or 0-ohm resistors on the PCB to bypass other devices in the chain, connecting the FPGA's TDI and TDO directly to the JTAG header. If the FPGA is detected when isolated, the problem lies with one of the other devices on the chain or the connections between them.
Problem #3: Unexpected High Current Draw or Overheating
Symptom: The FPGA draws significantly more current than expected, even with a blank or simple "blinky" design loaded. In severe cases, the device becomes hot to the touch very quickly after power-on.
Root Cause: This dangerous condition usually points to a hardware-level problem. The most likely culprits are a short circuit on the PCB (e.g., a solder bridge under the BGA), an incorrect voltage being applied to a power rail, or an I/O conflict where multiple drivers are fighting each other.
Fix: Power down the board immediately to prevent permanent damage. Proceed with caution:
-
Visual and Thermal Inspection:
- With the board powered off, use a microscope to inspect the area around and under the FPGA for any visible solder bridges or debris. Pay close attention to the dense decoupling capacitor arrays.
- If you have a thermal camera, it is an invaluable tool here. Power the board on for only a few seconds and capture a thermal image. A single, intense hot spot can pinpoint the location of a short circuit, whether it's on a power rail or an I/O pin.
-
Systematic Power Rail Check:
- Power off the board. Use a multimeter in resistance mode to measure the impedance between each power rail (VCCINT, VCCAUX, VCCOs) and ground. A healthy rail should measure in the tens or hundreds of ohms (or higher). A reading of just a few ohms or less indicates a likely short circuit.
- If you find a shorted rail, you must isolate the cause. It could be the FPGA itself or one of the many decoupling capacitors on that rail. This may require carefully removing capacitors one by one until the short disappears.
-
I/O Bank and Constraint Verification:
- An incorrect I/O standard assignment is a common software-induced hardware problem. For example, if you have an I/O bank powered by VCCO = 1.8V, but you constrain a pin in that bank as LVCMOS33 in your XDC file, the FPGA will attempt to drive the pin to 3.3V, creating a conflict and high current draw.
- Thoroughly review your constraints file. Ensure every `set_property IOSTANDARD` command corresponds to a pin in a bank powered by the correct VCCO voltage.
- Check for accidental output contention. Does your design have two different logic blocks trying to drive the same output pin? This can also cause high current and potential damage.
Comprehensive Debug Checklist
When you're stuck, a methodical checklist can save you from going in circles. Use this table to verify the fundamental health of your XC7A100T-1CSG324C system.
| Step | Check Item | Expected Result | If Failed |
|---|---|---|---|
| 1 | VCCINT Rail | Stable 1.0V (±5%) with low ripple | Check regulator, look for shorts |
| 2 | VCCAUX Rail | Stable 1.8V (±5%) with low ripple | Check regulator, look for shorts |
| 3 | VCCO Rails | Stable voltage matching I/O standard (e.g., 3.3V, 1.8V) | Check regulator, shorts, I/O bank assignments |
| 4 | PROGRAM_B Pin | Logic High | Check pull-up resistor, ensure no external driver is holding it low |
| 5 | INIT_B Pin | Goes High after power-on | If low, indicates power-on reset failure or bitstream CRC error. Re-check all power rails. |
| 6 | MODE Pins (M2, M1, M0) | Correct logic levels for selected config mode | Verify pull-up/pull-down resistors on PCB |
| 7 | JTAG TCK Signal | Clean clock signal, check for pull-down resistor | Lower JTAG frequency, check for shorts/opens |
| 8 | DONE Pin | Goes High after successful configuration | If low, configuration has failed. Start debug from step 1. |
This checklist covers the most critical points for initial board bring-up. If all these checks pass and the device still misbehaves, the problem may be more subtle, such as signal integrity on high-speed interfaces, incorrect timing constraints in your design, or a faulty component. Advanced tools like oscilloscopes with high-bandwidth probes and logic analyzers become essential at this stage. For further design examples and application notes, it's always a good idea to review the resources available for the entire product family. You can Browse Artix-7 Series documentation and parts to gain broader context on your specific issue.
Sourcing Genuine XC7A100T-1CSG324C Components
In today's strained supply chain, the risk of receiving counterfeit or improperly handled components is higher than ever. A counterfeit FPGA will not work, and can waste weeks of engineering time in futile debugging. An authentic part that has been stored in poor conditions (e.g., high humidity) can also cause intermittent failures or assembly problems.
Signs of a questionable component include:
- Poor Marking: Laser markings that are blurry, misaligned, or use the wrong font. Authentic Xilinx parts have crisp, precise markings.
- Package Condition: Scratches, signs of "blacktopping" (a process where an old part is sanded and re-marked), or inconsistent BGA ball appearance.
- Incorrect Date Codes/Lot Codes: Codes that don't align with known production runs or seem nonsensical.
- Unusually Low Price: If a price from an unauthorized channel seems too good to be true, it almost certainly is. FPGAs are high-value components, and deep discounts are a major red flag.
The only way to guarantee authenticity is to source components through a trusted, authorized, or highly vetted independent distributor. A reliable distributor provides traceability back to the original manufacturer, ensuring the parts are genuine and have been handled according to strict ESD and moisture sensitivity level (MSL) protocols. This prevents issues like poor solderability or internal damage from moisture absorption. When your project's success and timeline are on the line, the small premium for a verified component is invaluable. For reliable sourcing, you can Check XC7A100T-1CSG324C Inventory & Pricing with a distributor that understands the importance of component authenticity and quality control.
Video Demonstration
Frequently Asked Questions (XC7A100T-1CSG324C FAQ)
Why is the DONE pin on my XC7A100T-1CSG324C not going high?
If the DONE pin remains low, it signifies a configuration failure. The most common causes are incorrect power sequencing (VCCINT must be stable before VCCAUX and VCCO), incorrect configuration MODE pin settings, or a problem with the configuration flash memory. Start by verifying all power rails with an oscilloscope, then check the logic levels on the M0, M1, and M2 pins against the datasheet for your chosen configuration mode. Finally, ensure your configuration flash is programmed with a valid, non-corrupted bitstream.
Vivado can't detect my FPGA in the JTAG chain. What should I check first?
The first thing to check is the VREF pin on your JTAG header. This pin must be connected to the VCCO of the FPGA bank that houses the JTAG pins (TCK, TMS, TDI, TDO) to provide a voltage reference for the JTAG pod's I/O buffers. If VREF is missing or wrong, communication is impossible. After that, use a multimeter to verify the continuity of the entire JTAG daisy-chain (TDI -> TDO) from the connector through all devices on the board.
My FPGA gets extremely hot immediately after I power on the board. What's wrong?
This is a critical symptom, and you should power off the board immediately to prevent damage. An immediate overheating issue almost always indicates a direct short circuit. This could be a solder bridge under the BGA package shorting a power rail to ground, or an incorrect voltage being supplied to a rail (e.g., applying 1.8V to the 1.0V VCCINT rail). Use a multimeter to check the resistance-to-ground of each power rail and a thermal camera to pinpoint the location of the short.
Can I connect a 3.3V peripheral to an I/O pin on a bank powered by 1.8V?
No, you cannot. Each I/O bank on the Artix-7 is powered by its own VCCO rail, and all I/Os within that bank must conform to standards compatible with that VCCO voltage. Connecting a 3.3V signal to a pin in a 1.8V bank will violate the absolute maximum input voltage ratings specified in the datasheet, likely damaging the input buffer on the FPGA. Always ensure your external peripheral's I/O voltage matches the VCCO of the bank it is connected to.
What are the most critical power rails to check first during board bring-up?
The two most critical rails are the core voltage (VCCINT) and the auxiliary voltage (VCCAUX). VCCINT (1.0V) powers the internal logic fabric, and VCCAUX (1.8V) powers various internal resources including the JTAG and configuration logic. Without these two rails being stable and at the correct voltage, the FPGA will not even begin its power-on-reset sequence, and no other function, including configuration or JTAG, will be possible.

Alan Carter
Senior Hardware Engineer & Component Specialist
Alan has over 15 years of expertise in embedded systems design, FPGA architecture, and global semiconductor supply chains. He specializes in component cross-referencing, lifecycle management, and helping OEMs navigate supply shortages.