XC7Z030-1FBG676C Troubleshooting Guide: Common Problems and Solutions
Having issues with the XC7Z030-1FBG676C on your board? You're not alone. This powerful System-on-Chip (SoC) integrates a dual-core ARM Cortex-A9 processor with FPGA fabric, but its complexity can lead to frustrating bring-up and debug sessions. As a hardware engineer with over 15 years of experience designing with complex FPGAs and SoCs, I've seen a recurring set of problems. This guide covers the most common issues hardware engineers encounter with the XC7Z030-1FBG676C and provides proven, step-by-step fixes based on Xilinx datasheet recommendations and extensive field experience.

Table of Contents
- XC7Z030-1FBG676C Quick Reference
- Common Problem #1: Boot and Configuration Failure
- Common Problem #2: DDR3 Memory Interface Instability
- Common Problem #3: AXI Interconnect Timeouts and Data Corruption
- System-Level Debug Checklist
- Sourcing Genuine XC7Z030-1FBG676C Components
- Frequently Asked Questions
XC7Z030-1FBG676C Quick Reference
Before diving into troubleshooting, let's establish a baseline of the device's key characteristics. The XC7Z030-1FBG676C is a mid-range device in the Xilinx Zynq-7000 family, offering a balanced blend of processing power and programmable logic for a wide array of applications.
| Parameter | Value |
|---|---|
| Product Category | System On Chip (SoC) |
| Processing System (PS) | Dual-core ARM Cortex-A9 MPCore |
| Programmable Logic (PL) Cells | 125K |
| DSP Slices | 400 |
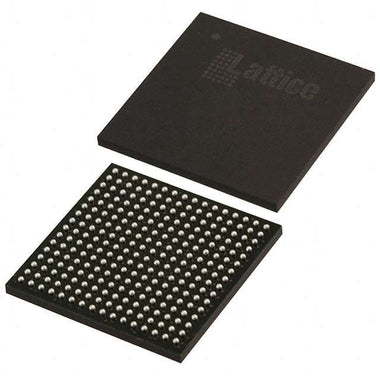
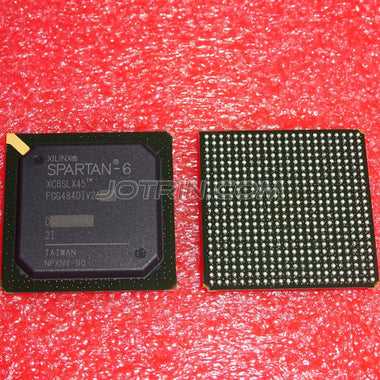
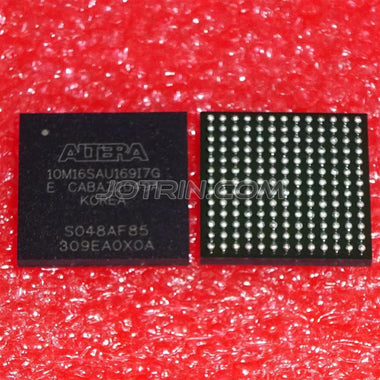
| Package | 676-pin Fine-Pitch BGA (FBG676) |
| Speed Grade | -1 (Commercial) |
| Operating Temperature (Junction) | 0°C to 85°C |
This specific part combines the software programmability of an ARM processor with the hardware parallelism of an FPGA, making it ideal for applications requiring real-time response and high-throughput data processing. Common use cases include machine vision systems, software-defined radio (SDR), advanced motor control, and automotive driver-assistance systems (ADAS). Its extensive I/O capabilities and on-chip resources like DSP slices and Block RAM enable the consolidation of many functions into a single chip, reducing board space and system cost.
Common Problem #1: Boot and Configuration Failure
Symptom: The most common and frustrating issue is a "dead" board. The device fails to boot from the selected media (QSPI, SD Card, NAND), the JTAG chain is not detected by Vivado Hardware Manager, or the PL's "DONE" signal never asserts. The processor appears to not execute any code, and there's no activity on the UART console.
Root Cause: This problem almost always traces back to one of three areas: power, clocking, or boot mode configuration. The Zynq-7000 has a complex, multi-stage boot process that is highly dependent on a stable hardware foundation. An incorrect power-on sequence, a noisy or out-of-spec clock, or improperly set boot mode pins will halt the process before it even begins.
Fix: Follow this systematic approach to isolate the failure:
-
Verify Power Supply Sequencing and Rails: This is non-negotiable. The Zynq-7000 datasheet (DS191) specifies a mandatory power-on sequence. Typically, the core voltage (VCCINT), followed by auxiliary and BRAM voltages (VCCAUX, VCCBRAM), and finally the I/O voltages (VCCOs). Use a multi-channel oscilloscope to probe these rails during power-on. Verify that they rise monotonically, are in the correct order, and meet the specified ramp times. Also, check the Power-On Reset signal (
PS_POR_B); it must be held low until all power rails are stable and then de-asserted. A faulty reset supervisor IC is a common culprit. -
Inspect the Boot Mode Pins: The Zynq device determines its boot source by sampling the state of the MIO[8:2] pins when
PS_POR_Bis released. Refer to the Zynq-7000 Technical Reference Manual (TRM, UG585) for the exact pin states for each boot mode (e.g., JTAG, QSPI, SD). Physically measure the voltage on these pins on your PCB to ensure the pull-up/pull-down resistors are correctly populated and establishing the intended logic levels. A solder bridge or incorrect resistor value here will prevent booting. -
Validate the Clock Source: The Processing System requires a stable clock input on the
PS_CLKpin. The frequency must be within the range specified in the datasheet. Use a high-impedance oscilloscope probe to measure the clock directly at the pin. Look for a clean sine or square wave with correct amplitude and frequency. An unstable oscillator, poor layout causing signal integrity issues, or a missing clock can all cause boot failure. - Isolate with JTAG: If power and clocking are good, switch the boot mode pins to "JTAG/Cascade" mode. This bypasses the on-board boot media and allows direct access via the JTAG port. In Vivado Hardware Manager, try to detect the device. If it fails, you have a JTAG signal integrity problem (check pull-ups, termination, and layout) or a fundamental hardware issue with the chip itself. If it connects, you can use the Vitis System Debugger to step through the First Stage Bootloader (FSBL) and pinpoint where it's failing. This confirms the core silicon is alive and points the problem toward the boot media or image.
Common Problem #2: DDR3 Memory Interface Instability
Symptom: The system boots partially but then hangs, often during OS loading. You may experience random kernel panics, application segmentation faults, or silent data corruption. Memory tests run from U-Boot or a bare-metal application fail intermittently or at specific addresses.
Root Cause: The high-speed DDR3 interface is extremely sensitive to physical layout and signal integrity. The root cause is typically a combination of incorrect PCB trace length matching, impedance mismatches, noisy power supplies for the DDR subsystem, or incorrect timing parameters configured in the Zynq's DDR controller.
Fix: Debugging DDR issues requires patience and the right tools.
- Review PCB Layout Against Guidelines: The first step is a thorough review of the PCB layout, comparing it against the stringent rules in the Xilinx Zynq-7000 SoC PCB Design Guide (UG933). Pay excruciating attention to trace length matching within byte lanes and between the clock/control signals and data groups. Verify that the trace impedance is controlled to the specified value (e.g., 50Ω single-ended). Any deviation here is a primary suspect.
- Scrutinize DDR Controller Configuration: In your Vivado project, open the Zynq Processing System IP configuration. Go to the "DDR Configuration" tab. Every parameter here must precisely match the DDR3 memory part used on your board. This includes the speed bin, CAS latency, timing parameters (tRC, tRAS, etc.), and on-die termination (ODT) settings. Use the values from the memory chip's datasheet, not generic presets.
- Power Rail Analysis: The DDR power rails are critical. The main DDR supply (e.g., 1.5V or 1.35V) must be stable under heavy load. More importantly, the termination voltage (VTT) must track VDDQ/2 with very high precision. Use an oscilloscope to monitor these rails during memory tests. Look for voltage droop, high-frequency ripple, or VTT tracking errors. A poor VTT regulator is a frequent source of hard-to-find memory errors.
- Run Exhaustive Memory Tests: Use the Vitis/SDK Memory Test application. Don't just run it once. Run it in a continuous loop for several hours. Some marginal timing issues only appear as the device heats up. If the test fails, the output will often indicate which bits or address ranges are problematic, which can provide clues about the physical location of the fault (e.g., a single failing bit points to one trace, while a whole byte failing points to a DQS strobe issue).
Common Problem #3: AXI Interconnect Timeouts and Data Corruption
Symptom: The ARM processor (PS) can't communicate correctly with a custom IP peripheral in the FPGA fabric (PL). Software drivers hang indefinitely waiting for a response, AXI bus errors (e.g., SLVERR or DECERR) are flagged, or data read from the peripheral is corrupted.
Root Cause: These issues stem from problems within the AXI bus protocol or the infrastructure connecting the PS to the PL. Common causes include: incorrect clock domain crossings (CDCs), violations of the AXI protocol by the custom IP, incorrect address mapping, or a forgotten or misconnected reset signal.
Fix: This is a logic and system integration problem, best debugged with in-system tools.
-
Verify Clocking and Resets: This is the most common mistake. Ensure your custom AXI peripheral's clock input (
s_axi_aclk) is connected to a valid clock source in the Vivado block design. Crucially, ensure its reset input (s_axi_aresetn) is connected to one of the `peripheral_aresetn` outputs from the Processor System Reset IP. An un-reset or improperly clocked AXI peripheral will never respond. - Check the Address Editor: In the Vivado block design window, open the "Address Editor" tab. Verify that your custom IP has been assigned a unique address range that does not overlap with any other peripheral. Confirm that the base address and range match what your software driver is attempting to access. A mismatch here will cause the AXI Interconnect to return a decode error (DECERR).
- Instrument the Bus with an ILA: The most powerful tool for this problem is the Integrated Logic Analyzer (ILA) IP. Instantiate an ILA in your block design and connect its probes to the AXI interface between the AXI Interconnect and your custom IP. Capture all the key signals: address (AWADDR/ARADDR), data (WDATA/RDATA), valid (xVALID), ready (xREADY), and response (BRESP/RRESP). Trigger the ILA on a write or read to your peripheral's address. The resulting waveform capture will show you exactly what's happening on the bus. You can see if your IP is failing to assert READY, asserting an error response, or has other protocol violations.
- Simulate with an AXI Verification IP (VIP): Before synthesizing, create a simulation testbench for your custom IP. Connect it to an AXI VIP core, which can be configured to act as a master and generate a wide range of legal and illegal AXI transactions. The VIP will automatically check for protocol violations in your IP's responses, catching bugs much earlier and more easily than with hardware debug.
System-Level Debug Checklist
When a system with an XC7Z030-1FBG676C fails, run through this checklist methodically. Do not skip steps, even if you think they are correct. Assumptions are the enemy of effective debug.
| Step | Check Item | Expected Result | If Failed |
|---|---|---|---|
| 1 | Power Rails | All VCCINT, VCCAUX, VCCO, etc., rails are within +/- 5% of nominal voltage as per datasheet. | Inspect and debug the corresponding power regulator circuit. Check for shorts. |
| 2 | Power-On Reset |
PS_POR_B signal is held low during power-up, then transitions cleanly high after all rails are stable. |
Check the reset supervisor IC, its input connections, and timing components. |
| 3 | PS Clock Input |
PS_CLK is a stable, clean waveform at the correct frequency (e.g., 33.333 MHz). |
Check the oscillator, its power, and the signal path to the Zynq pin. |
| 4 | Boot Mode Pins | MIO[8:2] pins have correct logic levels (measured with DMM) for the intended boot mode. | Check pull-up/pull-down resistor values, soldering, and potential shorts. |
| 5 | JTAG Chain | Vivado Hardware Manager auto-detects the JTAG chain, showing the ARM DAP and PL. | Check JTAG pod, cables, board connections, and TCK/TMS/TDI pull resistors. Lower JTAG clock speed. |
| 6 | DDR VTT Voltage | The VTT rail precisely tracks VDDQ/2 under both idle and load conditions. | Analyze the VTT regulator circuit; it may be unstable or unable to source/sink enough current. |
| 7 | PL Configuration DONE | The DONE pin transitions from low to high after the bitstream is loaded. | Verify bitstream integrity. Check PL power supplies (VCCINT, VCCBRAM). |
| 8 | UART Console Output | Bootloader messages appear on the configured UART port at the correct baud rate. | Check UART MIO pin assignment, level shifters, and terminal settings. |
This checklist covers the foundational hardware requirements for the Zynq SoC to function. If you can pass all these checks, the hardware is likely correct, and the problem is probably in the software, boot image, or PL design. For more complex issues, consider exploring the full capabilities of the Xilinx toolchain, including advanced debug features like cross-triggering between the PS and PL. If you are working with other devices in the same family, many of these principles apply across the board. You can Browse Zynq-7000 Series to see related parts and their documentation.
Sourcing Genuine XC7Z030-1FBG676C Components
In today's strained supply chain, the temptation to source components from unverified third-party brokers or auction sites is high. For a complex and high-value component like the XC7Z030-1FBG676C, this is a significant risk. Counterfeit or improperly handled devices are a major cause of board failures that defy all logical explanation.
Signs of a questionable part include blurry or inconsistent laser markings, different font or logo styles compared to a known-good part, evidence of BGA reballing (uneven or dull solder balls), or physical scratches. These parts may be completely non-functional, have a very high failure rate, or exhibit degraded performance that causes intermittent faults under thermal stress. Worse, they could contain malicious modifications, posing a security risk to your product.
The only way to guarantee authenticity is to source from authorized distributors or trusted, vetted independent distributors who have rigorous inspection and testing processes. These suppliers provide traceability back to the original manufacturer and ensure that components are handled and stored correctly to prevent moisture or ESD damage. While the upfront cost may seem higher, it pales in comparison to the cost of a production line stoppage, a product recall, or weeks of engineering time wasted debugging a fake part. Protect your design, your reputation, and your project timeline by prioritizing a secure supply chain. For reliable sourcing, you can Check XC7Z030-1FBG676C Inventory & Pricing with established distributors.
Video Demonstration
Frequently Asked Questions
Alan Carter
Senior Hardware Engineer & Component Specialist
Alan has over 15 years of expertise in embedded systems design, FPGA architecture, and global semiconductor supply chains. He specializes in component cross-referencing, lifecycle management, and helping OEMs navigate supply shortages.

Alan Carter
Senior Hardware Engineer & Component Specialist
Alan has over 15 years of expertise in embedded systems design, FPGA architecture, and global semiconductor supply chains. He specializes in component cross-referencing, lifecycle management, and helping OEMs navigate supply shortages.