LCMXO2-1200HC-4TG144C Troubleshooting Guide: Common Problems and Solutions
As a senior hardware engineer, I've seen my share of designs stall due to seemingly simple component issues. The Lattice MachXO2 family, including the versatile LCMXO2-1200HC-4TG144C, is a workhorse for system control, glue logic, and I/O expansion. However, its flexibility can introduce subtle pitfalls during board bring-up. If you're having issues with the LCMXO2-1200HC-4TG144C, you're not alone. This guide covers the most common problems hardware engineers encounter and provides proven, step-by-step fixes based on datasheet recommendations and extensive field experience.

Table of Contents
- LCMXO2-1200HC-4TG144C Quick Reference
- Problem #1: JTAG Communication and Programming Failures
- Problem #2: Device Fails to Configure from Internal Flash
- Problem #3: I/O Signal Integrity and Incorrect Voltage Levels
- Systematic Debug Checklist
- Sourcing Genuine LCMXO2-1200HC-4TG144C Components
- Frequently Asked Questions
LCMXO2-1200HC-4TG144C Quick Reference
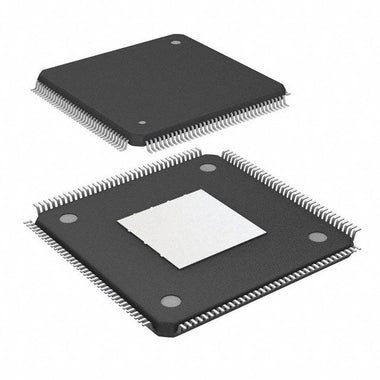
Before diving into troubleshooting, let's establish a baseline of the device's key characteristics. The LCMXO2-1200HC-4TG144C is a non-volatile CPLD (or low-density FPGA) from Lattice's MachXO2 family, known for its "instant-on" capability and integrated functionality like embedded block RAM (EBR) and PLLs. It's commonly used for power-up sequencing, bridging different logic standards, expanding microcontroller I/O, and implementing custom state machines. Its on-chip flash memory for configuration eliminates the need for an external configuration PROM, simplifying board design and reducing BOM cost. The 'HC' variant denotes a high I/O count version, making it ideal for I/O-intensive applications.
| Parameter | Value |
|---|---|
| Logic Cells (LUTs) | 1280 |
| Package | 144-pin Thin Quad Flat Pack (TQFP) |
| Maximum User I/O | 105 |
| Core Voltage (VCC) | 2.5V / 3.3V |
| I/O Bank Voltage (VCCIO) | 1.2V to 3.3V |
| Speed Grade | -4 (Fast) |
| Operating Temperature | Commercial (0°C to 85°C Junction) |
Common Problem #1: JTAG Communication and Programming Failures
Symptom: The Lattice Diamond Programmer software or other JTAG tools fail to detect the LCMXO2-1200HC-4TG144C. The JTAG chain scan either reports no devices or shows a corrupted chain. You are unable to program the device's internal flash or access debug features.
Root Cause: JTAG failures are almost always related to physical layer connectivity or power. The most frequent culprits are incorrect pull-up/pull-down resistors on the JTAG signals, a missing or incorrect JTAG reference voltage (VCCJ), noise on the power rails, or an improperly handled `PROGRAMN` pin.
Fix: Follow this systematic approach to resolve JTAG issues:
-
Verify JTAG Signal Termination: The JTAG interface is sensitive to signal integrity. Per the Lattice MachXO2 datasheet and JTAG best practices:
- TCK (Test Clock): Should have a weak pull-down resistor (e.g., 4.7 kΩ to 10 kΩ) to GND. This prevents spurious clocking when the JTAG programmer is disconnected.
- TMS (Test Mode Select): Requires a weak pull-up resistor (e.g., 4.7 kΩ to 10 kΩ) to VCCJ. This keeps the JTAG state machine in a known, idle state.
- TDI (Test Data In): Also requires a weak pull-up resistor (e.g., 4.7 kΩ to 10 kΩ) to VCCJ.
- TDO (Test Data Out): This pin is driven by the device and typically does not require a pull-up or pull-down, but ensure the trace to the JTAG header or next device in the chain is clean and not shorted.
- Check VCCJ Voltage: The VCCJ pin provides the I/O voltage reference for the JTAG port. It must be connected to the same voltage that your JTAG programmer uses for its I/O reference. For most modern programmers (like the Lattice USB Programmer Cable), this is typically 2.5V or 3.3V. Measure the voltage on the VCCJ pin; it must be stable and match the programmer's expected voltage. If VCCJ is unpowered or at the wrong voltage, the programmer's level shifters will not work correctly, leading to communication failure.
- Inspect the `PROGRAMN` Pin: This pin, when held low, puts the device into a programming state and resets its configuration. For normal operation and JTAG access, `PROGRAMN` must be pulled high to VCC (the core voltage rail) via a pull-up resistor (10 kΩ is typical). If this pin is floating or tied low, the device will not respond on the JTAG port as expected.
- Power Supply Integrity: Use an oscilloscope to probe VCC and VCCJ. Look for excessive ripple, noise, or droop. The MachXO2 requires clean power. Ensure adequate decoupling capacitors (e.g., 0.1 µF) are placed physically close to every power pin pair.
- Physical Connections: Buzz out the JTAG connections from the programmer header to the IC's pins to check for opens, shorts, or cold solder joints. Pay close attention to the 144-pin TQFP package, as solder bridges between adjacent pins are common.
Common Problem #2: Device Fails to Configure from Internal Flash
Symptom: The board powers up, JTAG programming may even succeed, but the device does not function as designed. The `DONE` pin, which should go high to indicate successful configuration, remains low. I/O pins are stuck in a high-impedance state or at an incorrect logic level.
Root Cause: This "failure to boot" issue often points to problems with power supplies, configuration settings within the Lattice Diamond project, or an external signal holding the device in a reset or programming state.
Fix: Debugging a configuration failure requires checking both hardware and software settings:
- Power Supply Ramps and Stability: While the MachXO2 family famously has no strict power supply sequencing requirements, there are best practices. The datasheet recommends that the core voltage (VCC) be powered up at the same time as or before the I/O banks (VCCIO). If a VCCIO bank powers up significantly before VCC, the I/O buffers can behave unpredictably. Probe your VCC and all VCCIO rails with an oscilloscope during power-up. Ensure they rise monotonically to their final, stable voltage without significant dips or oscillations. A common mistake is having a slow-ramping 3.3V rail for VCCIO and a fast-switching regulator for a 1.2V VCC, causing VCCIO to rise first.
-
Verify `PROGRAMN` and `DONE` Pin Connections:
- As mentioned before, `PROGRAMN` must be high for the device to attempt configuration from its internal flash. If it's being held low by another component on the board, the device will wait indefinitely.
- The `DONE` pin is an open-drain output. It requires an external pull-up resistor (e.g., 4.7 kΩ to 10 kΩ) to a suitable voltage rail (like VCCIO of its bank or VCC). Without this pull-up, the pin will never be able to signal a high state, even if configuration is successful. Use a multimeter to verify this pull-up is present and correctly connected.
-
Check Configuration Settings in Lattice Diamond: Open your project and go to the "Spreadsheet View" -> "Global Preferences". Scrutinize these settings:
- Master SPI Port: Ensure this is set to "Disable" if you intend to boot from the internal flash. If it's enabled, the device will try to become a master and clock data from an external SPI flash, which may not exist, causing it to hang.
- Slave SPI Port: Similarly, ensure this is disabled unless you are intentionally configuring the device from a microcontroller.
- DONE Pin: Confirm it's enabled and configured as an open-drain output.
- Watchdog Timer (`CONFIG_WDT`): If the watchdog timer is enabled in the configuration bitstream but your logic design does not continuously "pet" it, the watchdog will time out and force a reconfiguration. This can cause a continuous boot loop. For initial bring-up, it's often wise to disable the watchdog timer until the core logic is verified.
- Re-program the Device: It's possible the flash memory content is corrupt or a previous programming cycle was incomplete. Perform a full "erase, program, verify" cycle using the Lattice Diamond Programmer to ensure a known-good bitstream is loaded.
Common Problem #3: I/O Signal Integrity and Incorrect Voltage Levels
Symptom: The device configures successfully (`DONE` pin is high), but certain I/O pins do not drive to the expected voltage levels, communication with peripheral devices is unreliable, or high-speed signals exhibit excessive ringing, overshoot, or undershoot.
Root Cause: I/O issues are typically caused by a mismatch between the software configuration (I/O standard, drive strength, slew rate) and the hardware reality (VCCIO voltage, PCB layout, connected device's requirements).
Fix: A methodical check of the I/O configuration and physical layout is required:
-
VCCIO and I/O Bank Mismatches: The LCMXO2-1200HC-4TG144C has multiple I/O banks (Bank 0, 1, 2, etc.). Each bank is powered by a dedicated VCCIO pin (e.g., VCCIO0, VCCIO1). All I/Os within a single bank must operate at the same voltage, as defined by their VCCIO supply. A common error is to assign an LVCMOS33 I/O standard to a pin in a bank powered by VCCIO=1.8V. This will not work.
- Action: Create a map of your design. For each I/O pin used, note its bank number, its assigned I/O standard in the Lattice Diamond project (e.g., LVCMOS25, LVTTL, LVCMOS18), and the actual voltage you are supplying to that bank's VCCIO pin on the PCB. Any mismatch is a guaranteed failure point. For example, if a pin in Bank 1 is defined as LVCMOS33, you must supply 3.3V to the VCCIO1 pin.
-
Incorrect I/O Standard, Drive Strength, or Slew Rate:
- I/O Standard: Ensure the standard (e.g., LVCMOS33) matches the receiving device's input requirements. Driving a 5V-tolerant LVTTL input with a standard LVCMOS33 output is usually fine, but driving a 1.8V-only input with a 3.3V output will damage the receiver.
- Drive Strength: In Lattice Diamond, you can specify the output drive strength (e.g., 4, 8, 12, 16 mA). A drive strength that is too low may result in slow rise/fall times and an inability to drive the trace capacitance and load. A drive strength that is too high can cause significant overshoot, undershoot, and EMI. Start with a lower setting (e.g., 8 mA) and increase only if signal integrity analysis shows it's necessary.
- Slew Rate: For non-critical, low-speed signals, always set the slew rate to "SLOW". This reduces switching noise and EMI. Only use "FAST" for signals where timing is critical, and be prepared to analyze the signal integrity with an oscilloscope.
-
PCB Layout Issues: Signal integrity problems are often baked into the PCB. While a redesign may not be an option, look for:
- Long, meandering traces for high-speed signals.
- Lack of a solid ground plane underneath the signal traces.
- Crosstalk between adjacent, fast-switching signals.
- Missing termination resistors on transmission lines (generally needed for signals with edge rates faster than ~1 ns).
Video Demonstration
Systematic Debug Checklist
When faced with a non-functional board, avoid random probing. Work through this checklist methodically to isolate the problem. Use a DMM and an oscilloscope for these checks.
| Step | Check Item | Expected Result | If Failed |
|---|---|---|---|
| 1 | Core Power (VCC) | Stable, correct voltage (e.g., 3.3V) with minimal noise (<50mV ripple). | Check regulator, input supply, decoupling capacitors. |
| 2 | I/O Power (VCCIOx) | Stable, correct voltage for each bank used. | Check regulators for each bank. Ensure no bank is unpowered if used. |
| 3 | JTAG Power (VCCJ) | Stable voltage matching JTAG programmer's reference (e.g., 2.5V or 3.3V). | Check VCCJ supply. This is a common cause of JTAG failure. |
| 4 | `PROGRAMN` Pin | Held logic high (e.g., > 0.7 * VCC) during normal operation. | Check pull-up resistor. Ensure no other device is pulling it low. |
| 5 | JTAG Terminations | Pull-ups on TMS/TDI, pull-down on TCK. | Verify resistor presence, value, and connections with a DMM. |
| 6 | Clock Input (CLK) | Clean, stable clock signal with correct frequency and amplitude on input pin. | Check oscillator, crystal circuit, and signal path. |
| 7 | `DONE` Pin | Goes high after power-up. Requires an external pull-up resistor. | Check for pull-up resistor. If it stays low, suspect a configuration issue (see Problem #2). |
| 8 | I/O Pin State | Pins should be in their configured state (output high/low, input Hi-Z) after `DONE` goes high. | If `DONE` is high but I/Os are wrong, check VCCIO, I/O standard settings, and design logic. |
This checklist provides a structured approach to debugging the most common hardware-level issues. If you've gone through these steps and are still facing problems, the issue may lie deeper within your HDL code or system-level interactions. At this point, using an embedded logic analyzer, such as Lattice's Reveal, can be invaluable for observing internal signal states. It's also worth double-checking your design against the constraints and features of other devices in the family. You can Browse MachXO2 Series to compare datasheets and ensure you've selected the optimal part for your application's requirements, as a different density or package might offer a more straightforward solution.
Sourcing Genuine LCMXO2-1200HC-4TG144C Components
In today's strained supply chain, the temptation to source components from unverified third-party brokers or auction sites is high. However, for a complex device like the LCMXO2-1200HC-4TG144C, this is a significant risk. Counterfeit or improperly handled components are a major source of bring-up failures that can mimic design flaws, wasting weeks of engineering time.
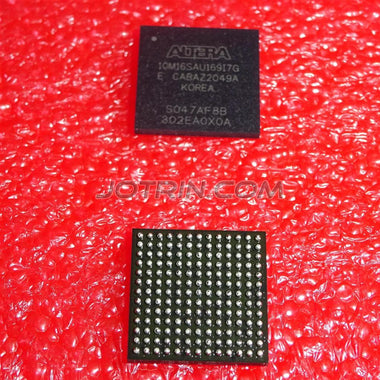
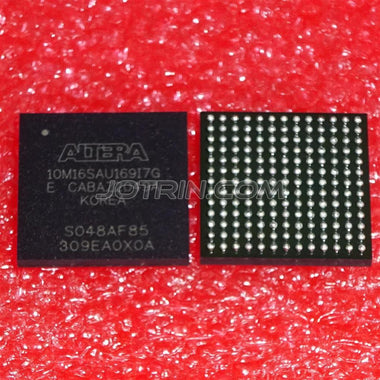
Signs of counterfeit or substandard parts include incorrect package markings (wrong font, laser etching quality), bent leads, signs of prior soldering (re-balled or re-tinned leads), and inconsistent date codes across a single reel. Functionally, these parts may be completely dead on arrival, fail to program, have drastically different timing characteristics, or suffer from premature failure in the field. They may even be a different, cheaper part entirely, remarked to look like the more expensive LCMXO2-1200HC.
The most effective way to mitigate this risk is to procure components through a trusted, traceable supply chain. Authorized distributors are the gold standard. For professional procurement and engineering teams, working with a global distributor that has robust quality control and counterfeit detection processes is critical. This ensures that the parts you receive are authentic, have been handled and stored correctly (preventing moisture and ESD damage), and meet the manufacturer's full specifications. When your design isn't working, the first variable you should eliminate is the authenticity of your components. Don't let a counterfeit part derail your project schedule. Check LCMXO2-1200HC-4TG144C Inventory & Pricing from a reliable source to ensure you are starting with a genuine, high-quality component.
Frequently Asked Questions (LCMXO2-1200HC-4TG144C FAQ)
Why is my LCMXO2-1200HC not detected by the JTAG programmer?
This is the most common bring-up issue. First, verify the VCCJ pin is powered at the same voltage as your JTAG programmer's I/O reference (e.g., 3.3V). Second, check that you have pull-up resistors on TMS and TDI, and a pull-down resistor on TCK, as recommended by Lattice. Finally, ensure the `PROGRAMN` pin is pulled high, as a low state can interfere with JTAG detection.
The device powers up, but the DONE pin stays low. What's wrong?
A low DONE pin indicates a configuration failure. First, confirm the DONE pin itself has an external pull-up resistor (typically 4.7kΩ-10kΩ) to its bank's VCCIO or another suitable rail, as it is an open-drain output. If the pull-up is present, check your configuration settings in Lattice Diamond to ensure you are not in an external boot mode by mistake. Also, verify that all power rails (VCC and all VCCIOs) are stable and within specification.
Can I use different I/O voltages on different banks of the LCMXO2-1200HC-4TG144C?
Yes, this is a key feature of the MachXO2 architecture. Each I/O bank (Bank 0, 1, 2, etc.) is powered by its own VCCIO supply pin. You can power VCCIO0 with 3.3V, VCCIO1 with 2.5V, and VCCIO2 with 1.8V, for example. However, all pins within a single bank must operate at the voltage supplied to that bank's VCCIO pin.
My design works in simulation but fails on the board. What should I check first?
When simulation passes but hardware fails, the issue is almost always related to the physical world. Start by checking I/O constraints. Ensure the I/O standard (e.g., LVCMOS33), drive strength, and slew rate settings in your project match the physical requirements of your PCB and connected components. Use an oscilloscope to check signal integrity on critical nets like clocks and high-speed interfaces for issues like ringing or slow edges that simulation wouldn't show.
What is the purpose of the PROGRAMN pin and how should it be connected?
The `PROGRAMN` pin is an active-low input that controls the device's configuration process. For normal operation, it must be pulled high to VCC via a resistor (e.g., 10kΩ). Pulsing this pin low will force the device to re-initialize its configuration from the internal flash memory, effectively acting as a "soft reset" for the FPGA logic. It's a very useful pin for debugging and for systems that require a way to force reconfiguration without a full power cycle.