XC7Z010-1CLG400I Troubleshooting Guide: Common Problems and Solutions
Having issues with the AMD-Xilinx XC7Z010-1CLG400I during board bring-up or in production? As a System on Chip (SoC) that tightly integrates a dual-core ARM Cortex-A9 processor with 7-series programmable logic, the Zynq-7000 family presents unique and complex failure modes. This guide, written from over 15 years of hardware engineering experience, covers the most common problems engineers encounter with the XC7Z010-1CLG400I and provides proven, step-by-step fixes based on datasheet recommendations and field experience.

Table of Contents
XC7Z010-1CLG400I Quick Reference
Before diving into troubleshooting, it's crucial to confirm the device's key characteristics. The XC7Z010-1CLG400I is part of the smallest device family in the Zynq-7000 series, making it a popular choice for cost-sensitive applications requiring both processing and custom logic acceleration.
| Parameter | Value |
|---|---|
| Device Family | Zynq-7000 |
| Processing System (PS) | Dual-core ARM Cortex-A9 MPCore |
| Programmable Logic (PL) | 28K Logic Cells, 35K Flip-Flops |
| Block RAM | 240KB |
| DSP Slices | 80 |
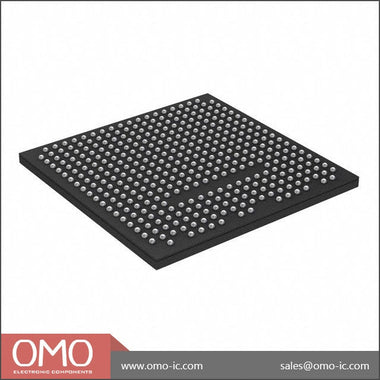
| Package | CLG400 (400-ball Chip Scale BGA) |
| Speed Grade | -1 (Slowest) |
| Temperature Grade | Industrial (-40°C to 100°C Junction) |
This SoC is designed for a wide range of applications, including industrial automation, machine vision, medical devices, and advanced driver-assistance systems (ADAS). Its strength lies in partitioning tasks: real-time control and standard OS-based applications run on the ARM cores, while high-throughput, parallel processing tasks are offloaded to the FPGA fabric (PL). Debugging requires understanding the intricate dependencies between these two domains.
Common Problem #1: Complete Boot Failure (No JTAG, No UART)
Symptom: The board powers on, but the device appears completely dead. The JTAG chain is not detected by the Vivado Hardware Manager, or only the PS-TAP controller is visible, not the PL-TAP. There is no character output on the designated UART peripheral, even from the initial BootROM stage.
Root Cause: This "dead bug" scenario is almost always a fundamental hardware issue related to power, clocking, or reset. The Zynq-7000's internal BootROM cannot execute without stable power and a valid input clock. The most common culprits are incorrect power supply sequencing, a missing or unstable PS_CLK input, or an improperly asserted reset signal (PS_POR_B).
Fix: Follow this sequence methodically. Do not proceed to the next step until the current one is verified.
- Power Rail Verification: The Zynq-7000 has multiple power domains that must be powered in a specific sequence. Refer to the Zynq-7000 SoC Data Sheet (DS190) for the recommended power-on sequence. At a minimum, VCCINT (core voltage) must be stable before VCCAUX, VCCO_DDR, and VCCO_MIO. Use a multi-channel oscilloscope to probe the main rails: VCCINT, VCCPINT, VCCAUX, and VCCO for the MIO banks you are using. Verify that they rise monotonically, are in the correct sequence, and have ripple within the datasheet specifications. Pay special attention to VCCPINT, the internal PL voltage, which is critical for the device's integrity.
- Clock Input (PS_CLK): The Processing System requires a stable clock source on the PS_CLK input pin to start the BootROM. This is typically a 33.33 MHz or 50 MHz oscillator. Probe the PS_CLK pin directly. You must see a clean, stable clock signal with the correct frequency and voltage levels (e.g., 1.8V LVCMOS). The absence of this clock is a showstopper.
- Reset Signal (PS_POR_B): The Power-On Reset signal, PS_POR_B, is an active-low input. It must be held low during power-up and then released (driven high) after all power rails and the PS_CLK are stable. Check the voltage on this pin. It should be low initially and then transition cleanly to high. A floating or noisy reset signal can prevent the device from ever starting its boot sequence. Ensure your power monitoring IC or reset supervisor is functioning correctly.
- Boot Mode Pins (MIO[8:2]): If power, clock, and reset are confirmed good, the next suspect is the boot mode configuration. The Zynq BootROM samples the state of the MIO[8:2] pins after PS_POR_B is de-asserted to determine the primary boot device (e.g., JTAG/Cascade, QSPI, NAND, SD Card). Refer to the Technical Reference Manual (UG585, Chapter 6) for the correct voltage levels and pull-up/pull-down resistor configurations for your desired boot mode. Physically measure the voltage on these pins during the reset release window to ensure they match the intended configuration. An incorrect setting may cause the BootROM to wait indefinitely for a device that isn't there.
Common Problem #2: PS-PL Communication Errors (AXI Timeouts)
Symptom: The ARM processor (PS) boots correctly, and you can run software (e.g., Linux or a bare-metal application). However, when the software attempts to access a custom peripheral in the programmable logic (PL) via an AXI interface, the transaction hangs, times out, or returns an error like SLVERR (Slave Error) or DECERR (Decode Error).
Root Cause: This points to a breakdown in the AXI communication path between the PS and PL. Common causes include: clocking mismatches, incorrect reset handling for the PL, errors in the Vivado address map configuration, or timing violations within the PL design that corrupt the AXI protocol.
Fix: Debugging AXI issues requires a combination of software and hardware tools.
- Clock and Reset Verification: The PL fabric is clocked by one or more FCLK_CLK# signals generated by the PS. First, confirm in your Vivado block design that you have enabled the necessary FCLK_CLK and that it's connected to your AXI interconnect and peripherals. Second, and critically, ensure the corresponding peripheral reset signal (e.g., FCLK_RESET0_N) is properly managed. This active-low reset must be de-asserted for the PL logic to operate. A common mistake is to leave the AXI peripherals in a perpetual reset state.
- Address Editor Check: In the Vivado block design, open the "Address Editor" tab. Meticulously verify that the AXI peripheral you are trying to access has been assigned a unique address range. Ensure this address matches the pointer or base address your software is using. A DECERR often indicates that the AXI Interconnect received a transaction for an address that is not mapped to any slave.
- Integrate an ILA Core: The most powerful tool for this problem is the Vivado Logic Analyzer (ILA). Instantiate an ILA core in your block design and connect its probes to the AXI interface signals between the AXI Interconnect and your custom peripheral. Capture the key signals: `AWVALID`, `AWREADY`, `WVALID`, `WREADY`, `BVALID`, `BREADY` for writes, and the corresponding `AR*` and `R*` signals for reads. A common failure pattern is the master asserting `AWVALID` (address valid) but the slave never asserting `AWREADY` (ready to accept address), causing a bus hang. This tells you the problem is within your custom peripheral; it's either stuck in a state or not correctly implementing the AXI handshake.
- Review Timing Reports: After implementing your design in Vivado, always check the timing summary. Unresolved setup or hold time violations, especially on paths related to the AXI interface, can lead to metastable behavior and corrupt the AXI protocol. Even if the design passes implementation, poor timing slack can cause intermittent failures at different temperatures or voltages.
Common Problem #3: Unstable Operation and Sporadic Resets
Symptom: The system boots and runs for a period, but then experiences random hangs, unexpected reboots, or data corruption. The failures may be more frequent under heavy processing load or at temperature extremes.
Root Cause: These symptoms are classic signs of Power Integrity (PI) or Signal Integrity (SI) issues. The most likely culprit is an inadequate Power Delivery Network (PDN) that cannot supply clean, stable voltage to the SoC's various power rails under dynamic load conditions. Excessive voltage ripple or droop on rails like VCCINT or VCCBRAM can cause internal logic to fail.
Fix: This is a hardware-centric problem that requires careful measurement and analysis.
- Power Rail Ripple Measurement: This is non-negotiable. You must measure the AC ripple on the critical power rails. The most important are VCCINT (PS and PL core), VCCPINT (internal PS core), and VCC_DDR (DDR memory interface). This requires a high-bandwidth oscilloscope and a low-inductance probe (e.g., a coaxial "pigtail" probe or a dedicated power rail probe). Measure the ripple as close to the BGA balls as possible, typically on the decoupling capacitors next to the device. Compare your peak-to-peak ripple measurements against the specifications in the datasheet (DS190). Exceeding these limits is a direct cause of instability.
- Decoupling Capacitor Review: The Zynq-7000 requires a carefully designed network of decoupling capacitors to provide instantaneous current to the chip. Refer to the Zynq-7000 SoC PCB Design and Pin-Planning Guide (UG933) for detailed recommendations. Check your layout to ensure that high-frequency, low-value capacitors (e.g., 0.1uF, 0.01uF) are placed on the same side of the board as the Zynq and as close as physically possible to the power and ground pins. Bulk capacitors (e.g., 10uF, 47uF) can be further away but are still essential for handling lower-frequency load changes.
- Run a Stress Test: To provoke the issue, create a design that maximizes power consumption and bus traffic. For example, run a memory test on the ARM cores while simultaneously running a DSP-intensive algorithm in the PL that reads/writes to Block RAM. Monitor the power rails with your oscilloscope during this stress test to capture the worst-case voltage droop and ripple. If the system fails consistently during the stress test, it strongly points to a PDN weakness.
- Thermal Analysis: Overheating can also cause instability. Check the device's temperature using the internal XADC or an external thermal camera. Ensure your thermal solution (heatsink, fan) is adequate, especially if the PL is heavily utilized. Industrial grade parts like the XC7Z010-1CLG400I are rated for a higher junction temperature, but a poor thermal design can still exceed limits.
Systematic Debug Checklist
When faced with a non-functional board, avoid random probing. Work through this checklist systematically to isolate the fault domain.
| Step | Check Item | Expected Result | If Failed |
|---|---|---|---|
| 1 | Power Rails | All rails (VCCINT, VCCPINT, VCCAUX, VCCOs) are present, stable, and within datasheet ripple specs. | Fix the power supply. Check regulator outputs, sequencing, and decoupling. |
| 2 | PS_CLK Input | A stable, clean clock signal of the correct frequency (e.g., 33.33 MHz) is present at the pin. | Check the oscillator, its power, and the signal path to the Zynq. |
| 3 | PS_POR_B Reset | Signal is held low during power-up, then transitions cleanly to high after rails are stable. | Check the reset supervisor IC and its input/output signals. |
| 4 | JTAG Connection | Vivado Hardware Manager detects the JTAG chain and both PS and PL TAPs. | Check JTAG signal integrity (TCK, TMS, TDI, TDO), pull-up/down resistors, and cable. Verify JTAG VCCO. |
| 5 | Boot Mode Pins | MIO[8:2] pins have the correct voltage levels for the intended boot mode at reset release. | Check pull-up/pull-down resistors and any logic driving these pins. |
| 6 | BootROM UART | For non-JTAG boot modes, check for BootROM status messages on the selected MIO UART pins. | If power/clock/reset/mode are good but no UART, the BootROM may be failing to read the boot media. |
| 7 | DDR Interface | DDR memory passes a basic memory test run from OCM via JTAG. | Check DDR power (VCC_DDR, VREF), signal integrity, termination, and timing constraints. |
This structured approach helps differentiate between board-level hardware failures (power, clock, reset) and configuration or application-level issues. If you can successfully connect via JTAG and run a simple "hello world" application from the On-Chip Memory (OCM), you have confirmed the core viability of the PS. Subsequent failures are then likely related to external peripherals like DDR memory or the PL configuration. For more complex designs, consider exploring the full Browse Zynq-7000 Series to see if a larger device with more debug capabilities or I/O might simplify your development process.
Sourcing Genuine XC7Z010-1CLG400I Components
In today's constrained supply chain, the risk of encountering counterfeit or substandard components is higher than ever. A counterfeit XC7Z010-1CLG400I can introduce insidious problems that mimic design flaws, wasting hundreds of engineering hours on debugging. These fake parts may be remarked devices of a lower speed or temperature grade, or simply empty packages that will never function.
Common signs of counterfeit SoCs include inconsistent laser markings, incorrect package dimensions, signs of blacktopping (sanding and recoating the package surface), or poor BGA ball quality. Functionally, they may fail at specific temperatures, exhibit drastically higher power consumption, or have non-functional logic blocks. The only way to be certain is to source from a trusted supplier with a rigorous quality control and anti-counterfeit inspection process.
Avoid sourcing critical components like FPGAs and SoCs from unvetted channels like third-party marketplace sellers or auction sites. The small upfront cost savings are trivial compared to the cost of a product recall or extensive redesign effort. Partnering with a distributor that provides traceability and authenticity guarantees is paramount for production environments. For reliable sourcing and to avoid the pitfalls of the grey market, it is essential to work with established distributors. Check XC7Z010-1CLG400I Inventory & Pricing to ensure you are receiving authentic, factory-traceable components for your mission-critical designs.
Video Demonstration
Frequently Asked Questions (XC7Z010-1CLG400I FAQ)
Why is my JTAG chain not detecting the XC7Z010-1CLG400I?
This is a common bring-up issue. First, verify the power. The JTAG port on the Zynq is powered by a specific VCCO bank; ensure that VCCO is supplied and stable. Second, check the JTAG signals (TCK, TMS, TDI, TDO) for proper signal integrity and termination. The TCK clock must be clean, and all signals should have appropriate pull-up or pull-down resistors as recommended in the schematic checklists. Finally, ensure PS_POR_B (reset) is de-asserted (high), as the JTAG TAP controller may be held in reset otherwise.
My device boots from JTAG but not from QSPI flash. What's wrong?
This indicates the core Zynq device is functional, but the boot process is failing. The primary suspect is the boot mode pin configuration. Double-check that the MIO[8:2] pins are correctly strapped for QSPI boot mode. Next, verify the QSPI flash itself: ensure it's a compatible model, the wiring is correct (especially clock and chip select), and the boot image (BOOT.bin) was created correctly by the Xilinx tools and programmed to address 0x00 of the flash.
Why are my DDR3 memory tests failing?
DDR interfaces are high-speed and sensitive to hardware layout. Failures are almost always due to signal integrity issues or incorrect timing. Use an oscilloscope to check signal quality on the data (DQ), strobe (DQS), and clock lines. Also, verify that the VREF voltage is stable and at the correct level (typically VDDQ/2). In your Vivado design, ensure you have used the correct DDR3 part configuration in the Zynq Processing System block and that all timing constraints for the board layout (trace lengths) have been entered accurately.
The ARM cores are running, but I can't access my custom IP in the PL. What should I check?
This is a classic PS-PL communication problem. First, check the basics: is the PL programmed? Ensure your software flow correctly loads the bitstream. Second, verify clocks and resets for the PL fabric (FCLK_CLK and FCLK_RESETn). Third, open the Address Editor in Vivado and confirm the AXI address of your IP matches the address your software is trying to access. If these are correct, use a Vivado ILA (logic analyzer) core to probe the AXI bus to see if the transaction is even reaching your IP.
What are the most critical power rails to check first during bring-up?
While all rails are important, the most critical to verify first are VCCINT (1.0V core voltage for PS/PL), VCCPINT (1.0V internal PS core voltage), and VCCAUX (1.8V auxiliary voltage). These are fundamental to the chip's internal operation. After confirming these are stable and within ripple specifications, check the VCCO rails for your MIO banks and DDR memory, as these are necessary for external communication. Always follow the power-on sequence specified in the datasheet to prevent latch-up conditions.