XC7K325T-1FFG900C Troubleshooting Guide: Common Problems and Solutions
Having issues with the XC7K325T-1FFG900C on your board? You're not alone. As a powerful and complex FPGA, it can present a unique set of challenges during board bring-up and system integration. This guide, written from the perspective of a senior hardware engineer, covers the most common problems encountered in the field and provides proven, step-by-step fixes based on official Xilinx datasheet recommendations and years of hands-on debugging experience. We'll move beyond simple "it doesn't work" and dive into the specific symptoms, root causes, and solutions for configuration failures, transceiver instability, and thermal issues.

Table of Contents
XC7K325T-1FFG900C Quick Reference Specifications
Before diving into troubleshooting, it's essential to have the key device parameters at hand. The XC7K325T-1FFG900C is a high-performance FPGA from the Xilinx (now AMD) Kintex-7 family, designed to offer a balance of price, performance, and low power consumption. It's a popular choice for applications requiring significant digital signal processing (DSP), high-speed connectivity, and logic capacity, such as software-defined radio, medical imaging, and 4G/5G wireless infrastructure.
| Parameter | Value |
|---|---|
| FPGA Family | Kintex-7 |
| Logic Cells | 326,080 |
| CLB Flip-Flops | 407,600 |
| Block RAM (Total) | 16,740 Kb |
| DSP Slices | 840 |
| GTX Transceivers | 16 channels @ up to 12.5 Gb/s |
| Package | FFG900 (900-pin Fine-Pitch BGA) |
| Speed Grade | -1 (Slowest commercial grade) |
| Temperature Grade | Commercial (0°C to 85°C Junction Temperature) |
This specific part number indicates a commercial temperature grade device in a 900-pin BGA package. Its substantial logic, memory, and DSP resources make it capable of handling complex algorithms, while its sixteen GTX transceivers provide ample high-bandwidth I/O for protocols like PCI Express, 10 Gigabit Ethernet, and CPRI.
Common Problem #1: Configuration and Boot Failures
Symptom: The most common and frustrating issue during board bring-up. You power on the board, but the FPGA appears dead. The 'DONE' indicator LED, typically connected to the FPGA's DONE pin, does not illuminate. When you connect a JTAG programmer (like a Xilinx Platform Cable USB II), the Vivado Hardware Manager either fails to detect the JTAG chain or reports an unstable connection.
Root Cause: This failure mode almost always points to one of three areas: power, configuration mode, or the configuration source itself. FPGAs have strict power-on sequencing requirements. If VCCINT, VCCAUX, and VCCO rails do not ramp up in the specified order or within the allowed time window, the internal power-on-reset circuitry may not function correctly, leaving the device in an unknown state. Furthermore, the configuration mode pins (M[2:0]) dictate how the FPGA attempts to load its bitstream (e.g., from an onboard QSPI flash or via JTAG). Incorrect pull-up/pull-down resistor values on these pins will cause the FPGA to listen on the wrong interface.
Fix: Follow this systematic approach:
- Verify Power Supply Sequencing: Consult the Kintex-7 FPGAs DC and AC Switching Characteristics Data Sheet (DS182). It specifies the required power-on sequence. Use a multi-channel oscilloscope to probe VCCINT (core voltage), VCCAUX (auxiliary voltage), and at least one VCCO (I/O bank voltage) during power-up. Ensure they ramp monotonically and either follow the recommended sequence or all ramp together within the specified maximum time. If the sequence is wrong, investigate your power management IC (PMIC) or discrete power sequencer.
- Check Power Rail Integrity: While probing, also check for noise and ripple on each supply rail. Place your oscilloscope probe tip as close to the FPGA's BGA footprint as possible. Excessive noise, often caused by insufficient decoupling capacitance or poor PCB layout, can prevent the FPGA from initializing correctly. Compare your decoupling strategy to the recommendations in the 7 Series FPGAs PCB Design Guide (UG476).
- Confirm Configuration Mode Pins: The M2, M1, and M0 pins are critical. They are sampled at power-on to determine the boot mode. Physically inspect the pull-up/pull-down resistors connected to these pins. Measure their resistance and verify they match your intended configuration scheme (e.g., for Master SPI 4x, M[2:0] should be '001'). Ensure these pins are not floating or being driven by another source unexpectedly.
- Isolate the JTAG Chain: If the JTAG chain is the issue, simplify it. If other devices are on the same chain, try to isolate the FPGA by using jumpers or modifying the board. Check the JTAG signals (TCK, TMS, TDI, TDO) for signal integrity. TCK is particularly sensitive; ensure it is properly terminated and has clean rising and falling edges. A slow TCK frequency (e.g., 1-3 MHz) is more robust during initial debug.
Common Problem #2: High-Speed Transceiver (GTX) Link Instability
Symptom: Your design includes a high-speed serial interface like PCI Express, SFP+, or Interlaken, but the link fails to initialize, drops intermittently, or exhibits a very high bit error rate (BER). In Vivado, using the IBERT (Integrated Bit Error Ratio Tester) core, the eye diagram appears completely closed or highly distorted.
Root Cause: The GTX transceivers are analog marvels sensitive to three primary factors: the quality of the reference clock, the cleanliness of their dedicated power supplies, and the signal integrity of the high-speed differential channel on the PCB. A high-jitter reference clock will prevent the transceiver's PLL from locking correctly. Noise on the MGTAVCC (analog core voltage) or MGTAVTT (analog termination voltage) rails can corrupt the delicate analog signal path. Finally, impedance mismatches, crosstalk, or excessive loss in the PCB traces will degrade the signal to the point where the receiver cannot recover the data.
Fix: Debugging GTX issues requires precision and the right tools.
- Analyze the Reference Clock: The reference clock for the GTX transceivers is non-negotiable. It must be a low-jitter source. Use a high-bandwidth oscilloscope with jitter analysis software or a spectrum analyzer to measure the phase jitter of the clock source as close to the FPGA input pins as possible. The value must be within the specification listed in the DS182 datasheet for your desired line rate. If it's out of spec, your clock source (oscillator, clock generator IC) is the problem.
- Scrutinize GTX Power Rails: The MGTAVCC and MGTAVTT rails are the most sensitive in the entire system. They should be powered by low-noise LDOs and have a dedicated filtering network, typically involving ferrite beads, as shown in UG476. Probe these rails right at the decoupling capacitors near the FPGA. Look for any high-frequency noise coupling from the digital supplies. A spectrum view on your scope can be very revealing here.
- Leverage Vivado IBERT: Before suspecting your RTL, use the IBERT core. This tool allows the FPGA to generate and check PRBS (Pseudo-Random Binary Sequence) patterns internally or across a channel. It provides a direct view of the signal quality as seen by the receiver's eye-scan hardware. If you get a clean, open eye in a near-end loopback test but a closed eye in a far-end test (with a link partner), the issue is likely in the PCB channel or the link partner's transmitter.
- Review Transceiver Attributes: The GTX Transceiver Wizard in Vivado sets hundreds of parameters. While the defaults are a good starting point, your specific channel may require tuning. Pay close attention to TX pre-emphasis and post-cursor settings, which compensate for channel loss. On the receiver side, the DFE (Decision Feedback Equalization) and LPM (Low Power Mode) settings can be adjusted to optimize performance for your specific channel characteristics.
Common Problem #3: Unexpected Thermal Issues and Overheating
Symptom: The system runs correctly for a few minutes but then becomes unstable, or the FPGA stops functioning entirely. Touching the heatsink reveals it is extremely hot. In some cases, the device may work at room temperature but fail when the ambient temperature rises.
Root Cause: The power consumption of a large FPGA like the XC7K325T-1FFG900C can be substantial and is often underestimated during the design phase. The root cause is typically one of two things: an inaccurate power analysis leading to an undersized thermal solution (heatsink and airflow), or inefficient RTL design that causes excessive dynamic power dissipation. The commercial 'C' grade part has a maximum junction temperature of 85°C, which can be easily exceeded without proper thermal management.
Fix: A hot FPGA is a sign of an impending failure. Address it immediately.
- Perform Accurate Power Analysis: If you haven't already, use the Xilinx Power Estimator (XPE) spreadsheet or the `report_power` command in Vivado. The key to accuracy is providing realistic data. Do not rely on default toggle rates. Use VCD (Value Change Dump) files from a post-synthesis simulation to get accurate activity factors for your design's signals. This will give you a much more realistic estimate of static and dynamic power.
- Evaluate the Thermal Solution: Check the datasheet for the package's thermal resistance, Theta-JA (Junction-to-Ambient). For the FFG900 package, this value is high enough that a heatsink is almost always required for any non-trivial design. Ensure the heatsink is properly specified for the power dissipation you calculated. Verify that it is mounted correctly with a quality Thermal Interface Material (TIM) and that there is adequate, unobstructed airflow (measured in LFM or CFM) across its fins.
- Check VCCINT Voltage: The core voltage has a squared effect on dynamic power (P ∝ f * C * V²). Even a small overvoltage on VCCINT (e.g., 1.05V instead of 1.00V) can significantly increase power consumption and heat. Measure the VCCINT rail under load to ensure your voltage regulator is accurate and stable.
- Optimize the RTL for Power: Use the power analysis reports in Vivado to identify modules or signals with the highest power consumption. Look for opportunities to implement intelligent clock gating to disable logic that is not actively in use. Analyze high-fanout nets and consider pipelining to reduce glitching, which is a major source of unnecessary dynamic power.
Video Demonstration
Systematic Debug Checklist
When faced with a non-functional board, avoid random probing. Work through a systematic checklist to isolate the problem logically.
| Step | Check Item | Expected Result | If Failed, Investigate... |
|---|---|---|---|
| 1 | Power Rails | VCCINT, VCCAUX, VCCOs, MGTAVCC, MGTAVTT, etc., are at their nominal voltage (±5%) and have low ripple/noise. | Voltage regulators (VRMs), decoupling capacitors, PCB power plane integrity. |
| 2 | Power-On Sequence | Rails ramp up in the order specified in the DS182 datasheet. | Power Management IC (PMIC) or sequencer logic and its configuration. |
| 3 | Input Clocks | All system and reference clocks are present, at the correct frequency, and have clean signal integrity. | Oscillators, clock buffers, clock signal routing, and termination. |
| 4 | Configuration Pins | M[2:0] pins have correct logic levels at power-on for the intended boot mode. INIT_B is not held low externally. | Pull-up/pull-down resistors, potential shorts, or contention on these pins. |
| 5 | JTAG Chain Integrity | Vivado Hardware Manager detects the device and passes the chain integrity test. | JTAG pod connections, TCK signal integrity, termination, and board-level JTAG wiring. |
| 6 | Configuration Status | INIT_B pin goes from low to high, indicating the FPGA is ready. After bitstream loading, the DONE pin goes high. | Configuration source (flash memory, JTAG), bitstream file integrity, CCLK signal. |
| 7 | Thermal State | With the system running, the FPGA junction temperature (as reported by the internal XADC or an external sensor) is well below the 85°C maximum. | Heatsink mounting, airflow, actual power consumption vs. estimate. |
This checklist forms the foundation of any FPGA board bring-up. If you methodically verify each of these items, you will find the root cause of the vast majority of "dead bug" issues. Remember to leverage the powerful suite of debug tools within the Vivado Design Suite, such as the Hardware Manager for JTAG interaction and the IBERT core for transceiver analysis. Many persistent problems can be traced back to the PCB design itself; never hesitate to cross-reference your layout with the official Xilinx PCB design guides. For more options and related components, you can Browse Kintex-7 Series devices to compare specifications and features.
Sourcing Genuine XC7K325T-1FFG900C Components
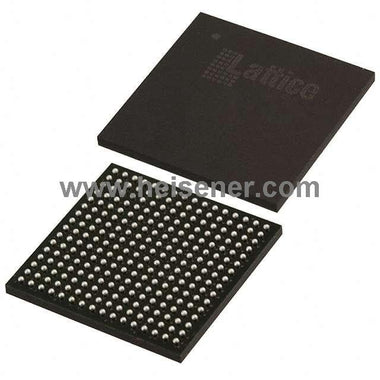
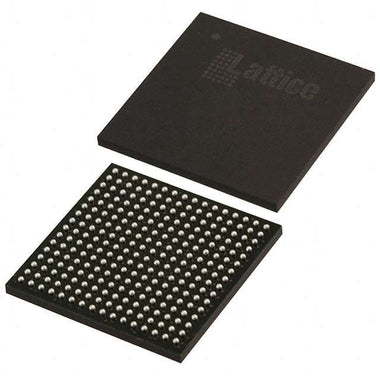
In today's constrained supply chain environment, the temptation to source components from unverified brokers can be high. However, for a complex and high-value component like the XC7K325T-1FFG900C, this is a significant risk. Counterfeit FPGAs are a pervasive problem and can manifest as devices that are completely non-functional, remarked parts (e.g., a slower speed grade or smaller device sold as a higher-spec one), or even empty packages. These fakes can cause all the nightmarish debug scenarios described above, with the added problem that they are fundamentally unfixable.
Common signs of counterfeit parts include poor quality laser markings (fuzzy, misaligned, or incorrect font), inconsistent texture or color on the package substrate, and uneven or tarnished BGA balls. However, sophisticated counterfeiters can produce visually convincing fakes. The only guaranteed method of ensuring authenticity is to procure components through authorized channels or from trusted independent distributors who have rigorous inspection and testing protocols. These protocols include detailed visual inspection, X-ray analysis to verify the die, and electrical testing to confirm functionality. Sourcing from a reliable partner not only prevents costly manufacturing rework but also saves countless engineering hours that would

Alan Carter
Senior Hardware Engineer & Component Specialist
Alan has over 15 years of expertise in embedded systems design, FPGA architecture, and global semiconductor supply chains. He specializes in component cross-referencing, lifecycle management, and helping OEMs navigate supply shortages.