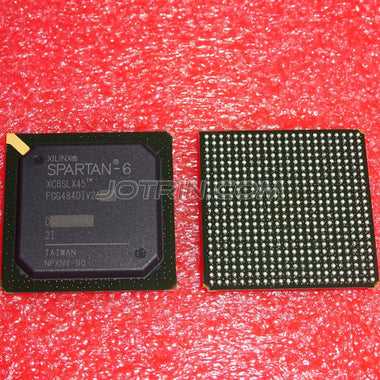
XC6SLX16-2CSG324C Troubleshooting Guide: Common Problems and Solutions
Having issues with the XC6SLX16-2CSG324C? As a hardware engineer with over a decade of experience bringing up FPGA-based systems, I've seen my share of stubborn boards. This guide is a distillation of that experience, covering the most common problems hardware engineers encounter with this popular Spartan-6 device. We'll provide proven, step-by-step fixes based on official Xilinx datasheet recommendations and hard-won field experience to get your design from "not working" to fully functional.

Table of Contents
XC6SLX16-2CSG324C Quick Reference
Before diving into troubleshooting, let's establish a baseline. The XC6SLX16-2CSG324C is a workhorse in the Xilinx Spartan-6 family, offering a balanced mix of logic, memory, and DSP resources. It's often selected for applications like industrial control, video processing, software-defined radio, and embedded systems that require more capability than a microcontroller but don't warrant a higher-end FPGA. Its CSG324 package is a 324-ball chip-scale BGA, which offers good I/O density while remaining manageable for assembly. Understanding its core specifications is the first step in any debug process.
| Parameter | Value |
|---|---|
| FPGA Family | Spartan-6 LX |
| Logic Cells | 14,579 |
| Number of Slices | 2,278 |
| Total Block RAM | 576 Kb |
| DSP48A1 Slices | 32 |
| Maximum User I/O | 232 |
| Package | CSG324 (15x15mm, 0.8mm pitch) |
| Speed Grade | -2 (Commercial Temperature Range: 0°C to 85°C Junction) |
Common Problem #1: Configuration Failure (DONE Pin Stays Low)
Symptom: After power-on or a PROGRAM_B pulse, the DONE pin on the FPGA never asserts high. This indicates that the device has not successfully loaded its configuration bitstream. The FPGA remains unconfigured and non-functional. You may also see the INIT_B pin held low, signaling an error during the configuration process.
Root Cause: This is arguably the most frequent and frustrating bring-up issue. The causes are numerous but typically fall into one of these categories:
- Power Supply Issues: Incorrect power-on sequencing, a missing voltage rail (VCCINT, VCCAUX, VCCO), or excessive ripple on a supply. Spartan-6 devices have a specific power-on sequence requirement: VCCINT (core voltage) must be stable first, followed by VCCAUX (auxiliary voltage), and finally VCCO (I/O voltage).
- Configuration Mode Mismatch: The M0 and M1 mode pins are not strapped correctly for the intended configuration scheme (e.g., Master SPI, Slave Serial, JTAG).
- Clocking Problems: The configuration clock (CCLK) is missing, unstable, or at the wrong frequency. For Master modes, the FPGA generates this clock; for Slave modes, it's an input.
- Bitstream/Flash Issues: The bitstream file is corrupt, intended for a different device, or the SPI flash memory is not responding, blank, or incompatible.
Fix:
Follow this systematic approach:
1. Verify All Power Rails: Use a multimeter and an oscilloscope to check every power rail.
- VCCINT (Core Voltage): Check for a stable 1.2V (nominal). According to the DS162 datasheet, the recommended operating range is 1.14V to 1.26V. Ripple should be minimal.
- VCCAUX (Auxiliary Voltage): Check for a stable 2.5V (nominal). The range is 2.375V to 2.625V. This rail powers internal resources like the DCMs and JTAG interface.
- VCCO (I/O Bank Voltages): Check each VCCO bank's voltage. This must match the I/O standard you intend to use (e.g., 3.3V for LVCMOS33, 2.5V for LVCMOS25).
- Power Sequencing: Use a multi-channel oscilloscope to capture the power-on sequence. Trigger on the first rail (VCCINT) and confirm that VCCAUX and VCCO rise after VCCINT is stable. Refer to Xilinx User Guide UG380 for the exact timing requirements.
- M0 and M1 Pins: Physically verify the pull-up/pull-down resistors on these pins. For the common Master SPI x1 mode, M0 should be pulled high and M1 pulled low. For JTAG configuration (which is always available regardless of M0/M1), you don't need to worry about these for initial debug with a programmer.
- PROGRAM_B Pin: This pin should be held high by a pull-up resistor. A low pulse on this pin initiates reconfiguration. Ensure it's not being held low unintentionally.
- INIT_B Pin: This is an open-drain output. It requires an external pull-up resistor. If it's low, it indicates a CRC error in the bitstream or other configuration error.
- In Master SPI mode, the FPGA generates CCLK after power-up. Probe the CCLK pin to see if a clock is present. If not, it points back to a power or fundamental device issue.
- In Slave modes, ensure your external clock source is providing a clean clock signal to the CCLK pin.
- If using an SPI flash, use a flash programmer or logic analyzer to read the device ID and verify you can communicate with it. Try loading a simple, known-good bitstream (like one that just blinks an LED) to rule out bitstream corruption.
- Ensure the bitstream was generated in ISE/Vivado for the exact part number: XC6SLX16-2CSG324C. A bitstream for a different speed grade or package will fail.
Common Problem #2: Intermittent Operation and Instability
Symptom: The FPGA configures successfully (DONE goes high), and the design appears to work initially, but it fails intermittently. Failures can manifest as random data corruption, state machine lock-ups, or the entire system crashing after a period of operation, especially under load or at higher temperatures.
Root Cause: These are often the hardest problems to debug and usually stem from either Power Distribution Network (PDN) issues or timing violations that were not caught during static analysis.
- Poor Power Integrity: Insufficient or poorly placed decoupling capacitors lead to voltage droop and high-frequency noise on the power rails, especially VCCINT. As logic inside the FPGA switches, it creates transient current demands that a weak PDN cannot satisfy, causing internal logic to fail.
- Signal Integrity Issues: Reflections, crosstalk, or ground bounce on high-speed I/O signals can corrupt data. This is common on interfaces like DDR memory, high-speed ADCs, or source-synchronous buses.
- Timing Violations: The design may have hidden setup or hold time violations that only manifest under specific process, voltage, and temperature (PVT) conditions. The static timing analysis (STA) might have passed, but with very little margin, or constraints were incomplete.
Fix:
This requires a more advanced diagnostic approach.
1. Analyze the Power Distribution Network (PDN):
- Probe the Rails Under Load: Solder a low-inductance connection (e.g., a coaxial cable or a dedicated test point) as close as possible to the FPGA's VCCINT and GND balls. Use a high-bandwidth oscilloscope (>1 GHz) with a 10x low-capacitance probe. Run a high-activity design on the FPGA and look for voltage droop and high-frequency noise. The ripple should be well within the datasheet's recommended limits.
- Review Decoupling Strategy: Compare your PCB layout against the recommendations in the Xilinx UG393 (Spartan-6 PCB Design Guide). Are there enough capacitors? Are the high-frequency ceramic caps (typically 0.1uF, 0.01uF) placed directly under the FPGA, as close to the BGA balls as possible? Are there sufficient bulk capacitors (e.g., 10uF, 100uF) nearby? A common mistake is placing capacitors too far away, increasing loop inductance and reducing their effectiveness.
- Run STA Across All Corners: In your FPGA toolchain (Xilinx ISE), re-run the timing analysis for "slow" and "fast" process corners. A design that passes at the "slow" corner (worst-case setup) might fail at the "fast" corner (worst-case hold).
- Constrain Everything: Ensure every single clock and I/O path is properly constrained. Unconstrained paths are a recipe for intermittent failures, as the tools have no timing goals to meet. Use the `TIMESPEC` constraints in your UCF file correctly. Pay special attention to clock-domain crossing (CDC) paths.
- Add Margin: If your timing margins are very small (e.g., less than 0.5 ns), the design is sensitive to on-chip variation and environmental factors. Consider using a faster speed grade part, optimizing the RTL, or adjusting the implementation strategy in the tools to improve timing.
Common Problem #3: JTAG Chain Not Detected
Symptom: When you connect your Xilinx Platform Cable USB or other JTAG programmer, the software (e.g., iMPACT or Vivado Hardware Manager) reports "Cannot detect JTAG chain" or shows a chain with incorrect devices or no devices at all.
Root Cause: JTAG is a simple serial bus (TCK, TMS, TDI, TDO), but it's sensitive to signal integrity and proper connections.
- Hardware Connection Issues: The most common cause. This includes a bad JTAG cable, incorrect pinout on the JTAG header, a cold solder joint on one of the JTAG pins, or a short/open on the PCB traces.
- Power Issues: The VCCAUX rail, which powers the JTAG TAP controller inside the FPGA, is missing or out of spec. The JTAG programmer's VREF pin might not be connected to a suitable I/O voltage on the target board.
- Signal Integrity on JTAG Lines: While JTAG is typically slow, long cables, stubs on the JTAG chain, or excessive noise can corrupt the signals. TCK is particularly sensitive.
- Incorrect Chain Topology: If the XC6SLX16 is part of a multi-device JTAG chain, the TDO of one device must connect directly to the TDI of the next. A break anywhere in this chain will make all downstream devices invisible.
Fix:
Debug the JTAG chain from the programmer back to the device.
1. Check Physical Connections:
- Verify Pinout: Double- and triple-check that the pinout of your JTAG header on the PCB matches the pinout of your programming cable. Pin 1 is often a point of confusion.
- Continuity Test: With the board powered off, use a multimeter in continuity mode to check the path from the JTAG header pin to the corresponding ball on the FPGA BGA. This can help find open circuits. Also check for shorts between adjacent JTAG lines (e.g., TCK shorted to TMS).
- VREF Connection: The JTAG programmer uses a VREF pin to sense the target's I/O voltage and set its driver levels correctly. Ensure the VREF pin on your JTAG header is connected to one of the VCCO rails on your board (e.g., 2.5V or 3.3V).
- Verify VCCAUX: As mentioned, VCCAUX (2.5V) is critical for the JTAG TAP controller. Confirm it is present and stable.
- Probe JTAG Signals: Use an oscilloscope to observe the JTAG signals at the FPGA pins. When the software attempts to scan the chain, you should see activity on TCK, TMS, and TDI. TCK should be a clean clock signal. TMS and TDI will look more like data. If TCK is noisy, rounded, or has significant ringing, you have a signal integrity problem. Try using a shorter JTAG cable or lowering the JTAG clock frequency in the programmer software.
- If there are multiple devices in the chain, try to isolate the XC6SLX16. If possible, use jumpers or board modifications to bypass other devices and connect the programmer directly to the FPGA. If the FPGA is then detected, the problem lies with one of the other devices or the connection between them.
Systematic Debug Checklist
When a board is dead on arrival, avoid random probing. Work through a logical checklist to isolate the fault domain. This table provides a structured approach to the initial bring-up and debug process.
| Step | Check Item | Expected Result | If Failed |
|---|---|---|---|
| 1 | Visual Inspection | No visible shorts, missing components, or bad solder joints. Correct component orientation. | Rework board as needed. Check under microscope. |
| 2 | Power Rail Shorts (Unpowered) | No short circuit between any power rail (VCCINT, VCCAUX, VCCOx) and GND. | Isolate short. Could be a bad cap, solder bridge, or failed IC. |
| 3 | Power Rail Voltages (Powered) | VCCINT=1.2V, VCCAUX=2.5V, VCCOx=Correct I/O voltage. All stable with low ripple. | Debug the corresponding voltage regulator circuit. Check enable signals. |
| 4 | Power-On Sequence | VCCINT rises first, then VCCAUX, then VCCO. | Adjust power supply sequencing logic or components. |
| 5 | Configuration Mode Pins (M0, M1) | Pins are at correct logic levels for the desired configuration mode. | Check pull-up/pull-down resistor values and connections. |
| 6 | Control Pins (PROGRAM_B, INIT_B) | PROGRAM_B is high. INIT_B is high (requires pull-up). | Check pull-up resistors. See if another device is holding the line low. |
| 7 | JTAG Chain Detection | FPGA is detected by iMPACT/Vivado. | Follow the JTAG debug steps in Problem #3. Check VREF. |
| 8 | Configuration DONE Pin | DONE pin asserts high after configuration attempt. | Follow the configuration failure debug steps in Problem #1. |
Further debugging often requires more advanced tools. A logic analyzer is invaluable for monitoring the configuration process from an SPI flash. An oscilloscope with good bandwidth is essential for checking signal integrity on high-speed interfaces. When dealing with complex issues, don't hesitate to simplify. Create a minimal FPGA design that does nothing but toggle an LED. If that works, you know the core platform (power, clocking, configuration) is sound, and the problem lies within your more complex user logic. As you debug, remember that the entire Browse Spartan-6 Series shares a common architecture, so solutions and techniques are often transferable between different parts in the family.
Where to Get Genuine XC6SLX16-2CSG324C
In today's strained supply chain, the source of your components is as critical as your design itself. The XC6SLX16-2CSG324C, being a mature and popular part, is a prime target for counterfeiters and unauthorized resellers. Using a suspect part can derail a project, leading to weeks of wasted debug time chasing phantom issues that are actually caused by a faulty component.
Common issues with non-genuine parts include:
- Remarked Devices: A lower-speed-grade part (e.g., a -1) is relabeled as a faster -2 speed grade. The part may work for simple designs but will fail timing on more complex ones.
- Recycled Components: Parts are desoldered from old PCBs, "reballed," and sold as new. These components have been subjected to multiple thermal cycles and may have reduced reliability or latent damage.
- Outright Fakes: A completely different, cheaper chip is packaged and marked to look like a Xilinx FPGA. These will fail immediately and catastrophically.
Video Demonstration
Frequently Asked Questions (XC6SLX16-2CSG324C FAQ)
Why is the DONE pin on my XC6SLX16-2CSG324C not going high?
If the DONE pin remains low, it means the FPGA has failed to configure. The most common culprits are power supply problems (incorrect voltage, sequence, or excessive noise), incorrect configuration mode settings on the M0/M1 pins, or an issue with the bitstream source like a corrupt file or a non-responsive SPI flash. Start by meticulously verifying all power rails (VCCINT, VCCAUX, VCCO) with an oscilloscope, then check the logic levels on your mode pins against the datasheet for your chosen configuration method.
My FPGA gets excessively hot, even when idle. What's wrong?
An FPGA running hot at idle (i.e., just after configuration with no active processing) often points to a power integrity issue or I/O contention. A short between a power rail and ground, even a partial one, can cause high current draw. Another common cause is I/O fighting: if the FPGA is driving an output pin high but an external device is driving it low, a large amount of current will flow, generating heat. Check your I/O constraints and ensure all output enables and pin directions are correctly defined.
How do I verify the power supply sequencing for a Spartan-6?
The correct power-on sequence is critical: VCCINT (1.2V core) must be stable first, followed by VCCAUX (2.5V auxiliary), and finally the VCCO (I/O) rails. To verify this, use a multi-channel oscilloscope. Connect one probe to each voltage rail (VCCINT, VCCAUX, VCCO) and set the trigger on the rising edge of the VCCINT supply. You should clearly see the other rails rise after VCCINT has reached its nominal voltage, as specified in the Spartan-6 datasheets (e.g., UG380).
My JTAG chain is not detected by the software. What are the first things to check?
First, check the physical connections: ensure your JTAG cable is good and the header pinout is correct. Second, verify that the JTAG programmer's VREF pin is connected to a VCCO rail on your board, as this tells the programmer what voltage levels to use. Third, confirm that the FPGA's VCCAUX rail (2.5V) is active, as it powers the internal JTAG logic. If these are correct, try lowering the JTAG clock speed in your programming software, as this can overcome signal integrity issues on noisy boards or with long cables.
Can I use a bitstream compiled for a 3.3V I/O to configure an FPGA with 2.5V VCCO banks?
The bitstream itself is not tied to a specific VCCO voltage. However, the I/O standard (IOSTANDARD) constraints within your project's UCF file are. If your design specifies an I/O standard like LVCMOS33, but the corresponding VCCO bank is powered at 2.5V, the I/O will not function correctly and may damage the FPGA or connected devices. You must ensure that the IOSTANDARD constraint for every pin matches the voltage supplied to its VCCO bank.