XC7Z010-1CLG400I Troubleshooting Guide: Common Problems and Solutions
Having issues with the XC7Z010-1CLG400I? As a hardware engineer, there's nothing more frustrating than a complex System-on-Chip (SoC) that fails to boot or behave as expected during board bring-up. This guide is designed for professionals like you, covering the most common problems encountered with the Xilinx Zynq-7000 series, specifically the XC7Z010-1CLG400I. We will provide proven, step-by-step fixes based on datasheet recommendations and extensive field experience to get your project back on track.

Table of Contents
XC7Z010-1CLG400I Quick Reference
Before diving into troubleshooting, it's crucial to have the key specifications of the XC7Z010-1CLG400I at hand. These parameters define the device's capabilities and operational requirements, which are often the root of bring-up issues. The XC7Z010 is the entry-point device in the Zynq-7000 family, integrating a dual-core ARM Cortex-A9 based Processing System (PS) with Artix-7 based Programmable Logic (PL) in a single chip. This makes it ideal for applications requiring a blend of software control and hardware acceleration, such as industrial control, medical imaging, and advanced driver-assistance systems (ADAS).
| Parameter | Value |
|---|---|
| Category | System on Chip (SoC) |
| Processing System (PS) | Dual-Core ARM Cortex-A9 MPCore™ |
| Max PS Clock Frequency | 667 MHz (-1 Speed Grade) |
| Programmable Logic (PL) | Artix-7 based, 28k Logic Cells |
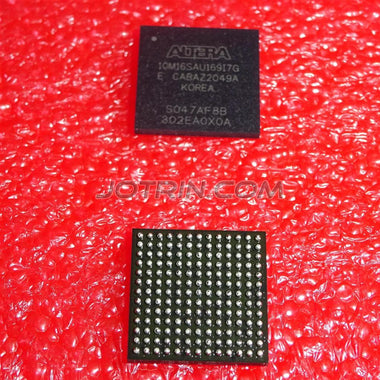
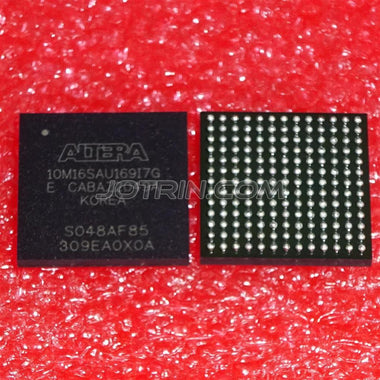
| Package | CLG400 (400-ball Chip Scale BGA, 17x17mm) |
| Temperature Grade | Industrial (-40°C to 100°C Junction Temperature) |
| Total Block RAM | 2.1 Mb |
The '-1' in the part number denotes the slowest speed grade, while 'I' signifies the industrial temperature range. The CLG400 package is a fine-pitch BGA, which demands careful PCB design and assembly. Understanding these core attributes is the first step in diagnosing any problem.
Common Problem #1: Boot Failure and No Console Output
Symptom: You apply power to your board, the power LEDs turn on, but nothing happens. There is no activity on the UART console, no "blinky" LED you programmed, and the device appears inert. This is the classic "dead board" scenario and is the most common hurdle during initial bring-up.
Root Cause: This issue almost always traces back to one of three areas: power, clocking, or boot mode configuration. The Zynq SoC is a complex device with a strict power-on sequence and multiple boot options determined by strapping pins. A failure in any of these foundational areas will prevent the BootROM code from executing correctly.
Fix: Follow this systematic approach:
-
Verify Power Supply Rails: The Zynq-7000 has multiple power domains that must be powered correctly. Refer to the DS190 datasheet. The most critical rails are:
- VCCPINT (1.0V): Core voltage for the Processing System (PS).
- VCCPAUX (1.8V): Auxiliary voltage for the PS.
- VCCPLL (1.8V): Power for the PS PLLs.
- VCCO_DDR (1.5V/1.35V): Power for the DDR interface.
- VCCINT (1.0V): Core voltage for the Programmable Logic (PL).
- VCCO_[BANK] (1.2V-3.3V): I/O bank voltages.
-
Check Reset Signals: There are two primary reset signals:
PS_POR_B(Power-On Reset) andPS_SRST_B(System Reset).PS_POR_Bmust be held low during power-up and then released. Ensure your reset circuitry (often a supervisor IC or RC network) provides a clean, low-to-high transition after all power rails are stable. A noisy or premature reset can put the SoC into an unknown state. -
Validate Boot Mode Configuration: The Zynq BootROM determines the boot device by sampling the state of the MIO[8:2] pins during the release of
PS_POR_B. For the XC7Z010, the most common boot modes are QSPI flash and SD card.- SD Card Boot: MIO[5:4] should be set to 10 (binary). This is typically done with pull-up and pull-down resistors. Verify these resistors are populated correctly and have the right values.
- QSPI Boot: MIO[5:2] should be set to 0001 or 0010 (for single or dual-stacked QSPI).
-
Inspect the Clock Source: The PS requires a stable clock input on the
PS_CLKpin, typically 33.33 MHz or 50 MHz. Use an oscilloscope to confirm the clock is present, has the correct frequency, and meets the jitter and voltage level requirements specified in the datasheet. Without a valid clock, the entire PS is non-functional.
Common Problem #2: JTAG Connection and Detection Failures
Symptom: You attempt to connect to the device using the Vivado Hardware Manager or a third-party debugger, but it fails to detect the Zynq SoC. You might see errors like "No devices found on JTAG chain" or an intermittent connection that drops frequently.
Root Cause: JTAG issues are almost exclusively physical hardware problems on the PCB. They can stem from incorrect wiring, improper signal termination, signal integrity problems on long JTAG traces, or an incorrect reference voltage for the JTAG I/O bank.
Fix: Debugging JTAG requires meticulous attention to the schematic and layout.
-
Schematic Verification: Double-check your JTAG connections against the recommendations in the Zynq-7000 Technical Reference Manual (UG585).
- The standard four signals (
TCK,TMS,TDI,TDO) must be correctly routed from the JTAG header to the SoC pins. -
TCK,TMS, andTDIrequire pull-up resistors (typically 4.7kΩ to 10kΩ) to the I/O voltage of the bank where the JTAG pins reside (VCCO).TDO, being an output, does not strictly require one but it's often included. - Ensure the JTAG header has a connection for the JTAG VREF signal from your debugger. This signal tells the debugger the I/O voltage level of the target.
- The standard four signals (
- VCCO and VREF Check: The JTAG pins are located in a specific I/O bank (Bank 0 or Bank 500 on many packages). This bank must be powered by its corresponding VCCO supply. If this bank is unpowered, the JTAG interface will not work. Confirm that the VCCO supply for the JTAG bank is active and at the expected voltage (e.g., 1.8V or 3.3V).
-
Signal Integrity: JTAG is not a high-speed interface, but poor layout can still cause problems.
- Keep JTAG traces as short as possible.
- Avoid stubs on the JTAG lines. If you have multiple devices in a chain, route them in a clean daisy-chain fashion (TDO of one device to TDI of the next).
- Use an oscilloscope to probe the
TCKsignal at the SoC pin. It should be a clean square wave. Ringing, reflections, or a slow rise/fall time can cause communication errors. If the signal is poor, you may need to lower the JTAG clock speed in your debugger software as a temporary workaround.
- Isolate the Device: If the Zynq is part of a longer JTAG chain, try to isolate it. If your board design allows, bypass other devices in the chain to confirm that the Zynq itself is accessible. This helps determine if the problem is with the Zynq's connection or another device on the chain.
Common Problem #3: DDR3 Memory Interface Instability
Symptom: The system boots successfully, perhaps even loading a Linux kernel, but it behaves erratically. You experience random crashes, kernel panics, data corruption, or the system hangs under heavy memory load. Sometimes, the First Stage Bootloader (FSBL) fails to complete, hanging during the DDR calibration step.
Root Cause: The DDR3 interface is a high-speed, source-synchronous bus that is extremely sensitive to PCB layout and signal integrity. The root cause is almost always a hardware design issue related to impedance mismatches, incorrect trace length matching, or power supply noise.
Fix: Resolving DDR issues can be challenging post-fabrication, but there are steps to diagnose and mitigate the problem.
-
Review Layout Against Guidelines: The single most important document for this is the Zynq-7000 SoC and Zynq UltraScale+ MPSoC PCB Design Guide (UG933). Compare your layout against its strict rules for:
- Trace Impedance: Data (DQ), Strobe (DQS), and Address/Command/Control lines must have a specific characteristic impedance, typically 40-50Ω.
- Length Matching: Traces within a byte group (e.g., DQ[7:0] and DQS) must be matched to within a few millimeters. The clock and address/command lines must also be matched to the data groups. Any significant mismatch causes timing skew.
- Power Delivery Network (PDN): The VCCO_DDR and VTT power rails must be extremely low-noise. This requires ample decoupling capacitors placed very close to the SoC and DDR memory chips. Use a high-bandwidth oscilloscope to measure noise and ripple on these rails.
-
Software/Firmware Tuning: The Zynq Processing System configuration wizard in Vivado/Vitis generates timing parameters for the DDR controller.
- Double-check Part Selection: Ensure you have selected the exact DDR3 part number used on your board. Even minor differences in timing between parts can cause failure. - Run Memory Tests: Use the built-in memory test application template in Vitis. This runs various patterns (walking ones, etc.) to stress the memory interface and can often pinpoint which bits or byte lanes are failing. This information can help correlate failures to specific layout areas.
- Adjust Drive Strength and Slew Rate: In the Vivado configuration, you can adjust the output drive strength and slew rate for the DDR interface pins. A stronger drive can help overcome some signal integrity issues, but can also increase ringing and crosstalk. This is a process of trial and error and should be done cautiously.
- Temperature Effects: On industrial-grade parts, test the board across its temperature range. DDR timing is sensitive to temperature. A board that works in the lab at 25°C may fail in a thermal chamber at 85°C. This often indicates marginal timing that needs to be addressed through layout improvements or software tuning.
Systematic Debug Checklist
When a board is failing, avoid random probing. Use a systematic checklist to ensure all foundational elements are correct before moving to more complex software or logic issues.
| Step | Check Item | Expected Result | If Failed |
|---|---|---|---|
| 1 | Core Power Rails (VCCPINT, VCCINT) | Stable 1.0V ±5% | Check regulator, load, and short circuits. |
| 2 | Auxiliary & I/O Power (VCCPAUX, VCCOs) | Stable 1.8V, 3.3V, etc. as per design | Verify regulators for each rail. Unpowered I/O banks can cause major issues. |
| 3 | Power-On Reset (PS_POR_B) | Held low during power-up, clean rising edge after rails are stable. | Check reset supervisor IC or RC circuit. A bouncy reset is fatal. |
| 4 | System Clock (PS_CLK) | Stable, correct frequency (e.g., 33.33MHz), valid logic levels. | Check oscillator, crystal, and any clock buffer circuitry. |
| 5 | Boot Mode Pins (MIO[8:2]) | Correct logic levels for desired boot mode (e.g., SD card, QSPI). | Verify pull-up/pull-down resistor values and placement. |
| 6 | JTAG Connectivity (TCK, TMS, TDI, TDO) | Clean signals, correct pull-ups, VCCO for JTAG bank is ON. | Check schematic, layout, and physical soldering of JTAG header and SoC. |
| 7 | UART TX Line | Check for any data bursts immediately after reset release. | If data appears but is garbled, check baud rate settings. If no data, BootROM may have failed earlier. |
This checklist covers the "is it alive?" stage of bring-up. If all these checks pass but the system still fails to load a bootloader, the problem likely lies in the boot media (corrupt SD card image, unprogrammed QSPI flash) or a more subtle hardware issue like the DDR interface discussed previously. Always have a known-good reference design or evaluation board to compare against. This can be invaluable for understanding expected waveforms and behaviors. If you are exploring different options or need to replace a suspect device, you can Browse Zynq-7000 Series to find compatible parts and compare specifications.
Sourcing Genuine XC7Z010-1CLG400I Components
In today's constrained supply chain, the temptation to source components from unvetted third-party brokers or marketplaces is high. However, for a complex and high-value device like the XC7Z010-1CLG400I, this is a significant risk. Counterfeit or improperly handled components are a primary cause of inexplicable failures that can waste weeks of engineering time.
Signs of a non-genuine or poorly handled part include:
- Poor physical appearance: Scratches, inconsistent laser markings, different texture or color compared to a known-good part. Blacktopping (repainting the surface) is a common technique to hide original markings.
- Incorrect packaging: Devices should arrive in sealed, anti-static bags, often with moisture sensitivity level (MSL) indicators and desiccant packs. Loose parts in a bin are a major red flag.
- Functional failures: The most insidious problem. A counterfeit part may appear to work partially—it might be detected by JTAG but fail memory tests or crash under load. These are often lower-grade parts remarked as higher-grade industrial parts.
- Date code inconsistencies: A batch of parts with wildly different date codes may indicate they were pulled from various scrap boards.
The only way to guarantee authenticity is to source through authorized distributors or highly trusted, traceable independent distributors. These suppliers have quality control systems in place to detect and prevent counterfeit parts from entering the supply chain. They provide traceability back to the original manufacturer. When your project's success and your company's reputation are on the line, the small premium paid for a guaranteed genuine component is a worthwhile investment. To ensure you are getting authentic, traceable components for your build, Check XC7Z010-1CLG400I Inventory & Pricing from a reliable source.
Video Demonstration
Frequently Asked Questions (XC7Z010-1CLG400I FAQ)
Why is my XC7Z010-1CLG400I not booting from the SD card?
This is a very common boot issue. The most likely cause is an incorrect boot mode configuration. The Zynq device checks the state of the MIO pins at power-on to determine the boot source. For SD card boot, you must ensure the MIO[5:4] pins are configured correctly with external pull-up/pull-down resistors to set the '10' binary pattern. Other causes include a poorly formatted SD card, a corrupt or missing BOOT.BIN file, or physical connection issues with the SD card slot itself.
My JTAG debugger can't detect the Zynq device. What should I check first?
Start with the physical layer. First, confirm that the I/O bank containing the JTAG pins is powered; check its VCCO supply. Second, verify that your schematic has the required pull-up resistors on TCK, TMS, and TDI. Third, check that your JTAG pod's VREF pin is connected to the VCCO of the JTAG bank on your board, so the debugger knows the correct voltage levels. If these are all correct, lower the JTAG clock speed in your software to its lowest setting to rule out signal integrity issues.
The system crashes randomly. Could it be the DDR3 memory?
Yes, random crashes, especially under load, are a classic symptom of DDR memory interface instability. This is a high-speed interface that is extremely sensitive to PCB layout issues like incorrect trace length matching, impedance control, and power supply noise. Even if the system boots, marginal signal integrity can lead to bit errors that corrupt data or instructions, causing unpredictable behavior. Re-run memory tests from Vitis and review your PCB layout against Xilinx's official design guidelines (UG933).
What are the essential power rails I must verify for the XC7Z010-1CLG400I?
For a basic "is it alive" check, you must verify several key power rails. The most critical are VCCPINT (1.0V for the PS core), VCCPAUX (1.8V auxiliary), VCCPLL (1.8V for PLLs), and VCCINT (1.0V for the PL core). Additionally, you must power the VCCO for any I/O bank you are using, including the one for your boot device, DDR memory (VCCO_DDR), and JTAG interface. All rails should be stable and within the datasheet's specified tolerance before the power-on reset is released.
Can I run the ARM cores without programming the FPGA logic?
Absolutely. The Zynq architecture is designed to be "PS-first." The ARM Cortex-A9 Processing System (PS) can boot and run independently of the Programmable Logic (PL). You can boot a full operating system like Linux on the PS without ever loading a bitstream into the PL. The PL section remains powered down to save energy until it is explicitly configured by the PS, typically by loading a bitstream file from the processor's filesystem.