When designing a portable, multi-sensor data acquisition system, the central processing hub must be both powerful and power-efficient. The Xilinx XC7A35T-1CPG236C Artix-7 FPGA is an excellent candidate for this role, providing the logic resources to handle multiple disparate sensor interfaces simultaneously. Its configurable logic allows it to perform real-time data aggregation, pre-processing, and buffering, offloading these tasks from a main system processor and enabling a more responsive and robust final product.
Table of Contents
Application Context: Where XC7A35T-1CPG236C Fits in the System
In the architecture of a modern portable environmental monitor, the XC7A35T-1CPG236C serves as the "central nervous system." Imagine a system designed to measure temperature, humidity, barometric pressure, air quality (particulate matter), and ambient light. Each of these sensors often communicates over a different protocol—I2C for the temperature/humidity sensor, SPI for the pressure sensor, and a UART-based interface for the air quality sensor. The FPGA is uniquely suited to manage this complexity.
A system block diagram would place the XC7A35T-1CPG236C at the very center. On one side, it connects directly to the various sensors. The FPGA's general-purpose I/O (GPIO) pins are configured with the appropriate electrical standards (e.g., LVCMOS33, LVCMOS18) by setting the VCCO voltage for the respective I/O bank. Inside the FPGA, we instantiate soft-core controllers for I2C, SPI, and UART protocols. This is the power of FPGAs: you create the exact hardware peripherals you need.
The FPGA's role extends beyond simple communication. As data streams in from the sensors, it can be timestamped and buffered in the FPGA's internal Block RAM. The 90 available DSP slices can be used to implement digital filters, such as a moving average filter on a noisy sensor reading, directly in hardware. This pre-processing ensures that the data logged or sent to a host system is clean and consistent, without burdening a software-based processor with these repetitive, high-speed tasks.
On the other side of the system, the FPGA interfaces with the outside world. It might drive a small graphical display via a parallel RGB interface or even a serialized LVDS link, using its high-speed I/O capabilities. For data logging, a SPI-based SD card controller can be implemented in the logic fabric, allowing the device to store gigabytes of sensor readings autonomously. Finally, for real-time monitoring or configuration, the FPGA can communicate with a host PC or single-board computer via a high-speed UART, often bridged to USB with an external IC like an FTDI chip. The XC7A35T-1CPG236C acts as the master orchestrator, polling sensors at precise intervals, processing the data, updating the display, and managing storage, all in a deterministic, parallel fashion that is difficult to achieve with a traditional microcontroller.
Core Specifications for This Application
| Parameter | Value | Application Relevance |
|---|---|---|
| Logic Cells | 33,280 | Provides ample resources for implementing multiple bus controllers (SPI, I2C, UART), data processing state machines, and system glue logic. |
| Block RAM | 1,800 Kb | Essential for creating data buffers (FIFOs) for each sensor stream, preventing data loss and allowing the system to handle data bursts. |
| DSP Slices | 90 | Enables real-time, hardware-accelerated signal processing, such as applying FIR filters to sensor data or performing FFTs for vibration analysis. |
| Maximum User I/O | 106 (CPG236 Package) | Sufficient I/O count to connect to a wide array of sensors, a display, an SD card, and a host interface simultaneously. |
| Clock Management Tiles (MMCM) | 5 | Allows for the synthesis of multiple, phase-aligned clock domains from a single input clock, critical for running different interfaces at their required speeds. |
| Core Voltage (VCCINT) | 1.0V (Nominal) | Defines the primary power rail for the FPGA's internal logic. Requires a precise, stable, and low-noise supply for reliable operation. |
| I/O Bank Voltage (VCCO) | 1.2V to 3.3V | Allows different I/O banks to interface with various logic levels (e.g., a 1.8V sensor and a 3.3V SD card) without external level shifters. |
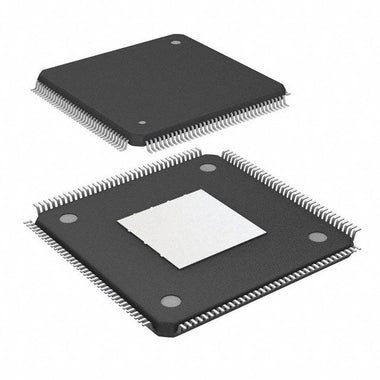
| Package | CPG236 | A 236-pin Chip Scale Ball Grid Array (BGA) with a 0.5mm pitch. This compact package is ideal for space-constrained portable devices but requires advanced PCB design and assembly. |
Reference Circuit and Component Selection
Designing a stable and reliable circuit around the XC7A35T-1CPG236C involves careful attention to power, configuration, and clocking. A minimal system requires several key external components.
Power Delivery Network (PDN): The FPGA requires at least three distinct voltage rails:
- VCCINT (1.0V): This is the core voltage and is the most power-hungry rail. A high-efficiency switching regulator (buck converter) capable of supplying at least 2-3A is recommended to handle transient loads. The output must be heavily decoupled with a mix of bulk capacitors (e.g., 10-47µF) and high-frequency ceramic capacitors (1µF, 100nF, 10nF) placed as close to the BGA pins as possible.
- VCCAUX (1.8V): This auxiliary rail powers internal logic like JTAG and clock management. It has lower current requirements than VCCINT but is more noise-sensitive. A low-dropout regulator (LDO) fed from a main system rail is a common and effective choice.
- VCCO (1.2V - 3.3V): This rail powers the I/O buffers. The XC7A35T has multiple I/O banks, and each can be powered by a separate VCCO supply. For our data acquisition example, one bank might be set to 3.3V for the SD card and UART interface, while another could be 1.8V for a modern, low-power sensor. This flexibility is a key advantage of the Artix-7 architecture.
The power-on sequence is critical: the official Xilinx documentation specifies VCCINT, then VCCAUX, then VCCO. This can be managed with a dedicated power sequencer IC or by using the "Power Good" and "Enable" pins of the individual voltage regulators.
Configuration and Boot: For a standalone embedded system, the most common configuration method is Master SPI mode. The FPGA acts as the SPI master and reads its configuration file (the bitstream) from an external SPI NOR Flash memory chip upon power-up. Key connections include the dedicated configuration pins (CCLK, MOSI, DIN, CSO_B) between the FPGA and the flash chip. The mode pins (M[2:0]) must be pulled to the correct levels (e.g., `M[2:0] = 001` for Master SPI x1) to select this boot mode. A standard 8-pin SOIC flash chip from a vendor like Micron or Winbond is a typical choice.
Clocking: The FPGA needs a stable input clock source. A 50 MHz or 100 MHz canned crystal oscillator is a robust choice. This single clock is fed into one of the FPGA's dedicated clock-capable input pins. From there, the internal Mixed-Mode Clock Managers (MMCMs) can be used to synthesize all other required clocks—for example, a 400 kHz clock for the I2C master, a 25 MHz clock for the SPI bus, and a 125 MHz clock for a high-speed internal data path. The flexibility of the entire Browse Artix-7 Series makes it suitable for a wide range of clocking schemes.
Design Pitfalls and How to Avoid Them
| Common Mistake | Symptom | Fix |
|---|---|---|
| Incorrect Power-On Sequencing | FPGA fails to configure; high inrush current; JTAG chain is not detected. | Strictly follow the datasheet sequence (VCCINT, then VCCAUX, then VCCO). Use a power sequencer IC or chain the 'Power Good' output of one regulator to the 'Enable' input of the next. |
| Insufficient Decoupling | System is unstable, random bit errors, logic fails under high activity, configuration fails intermittently. | Adhere to Xilinx User Guide UG475. Use a power integrity simulator. Place multiple capacitors of different values (e.g., 10µF, 1µF, 100nF) directly under the BGA on the back side of the PCB for each power pin. |
| Floating Configuration Pins | FPGA does not attempt to configure from flash, or enters an unknown state. | Ensure M[2:0] mode pins are tied to GND or VCCAUX with weak pull-up/pull-down resistors to select the correct boot mode. Ensure PROGRAM_B and DONE pins have external pull-up resistors as recommended. |
| Poor BGA Fanout/Routing | Signal integrity issues, shorts during assembly, non-functional I/O pins. | Use a PCB fabricator capable of the required line/space widths (typically 4mil/4mil or less for 0.5mm pitch). Use via-in-pad or microvias for inner ball escape. Route critical signals like clocks and high-speed I/O with impedance control. |
Avoiding these pitfalls requires a "measure twice, cut once" mentality. The CPG236 package, with its 0.5mm ball pitch, is not forgiving. Before layout begins, the hardware engineer must thoroughly review the Xilinx 7 Series FPGAs PCB Design and Pin-Planning Guide (UG475). This document is as important as the device datasheet. It provides detailed recommendations for PCB stack-up, decoupling capacitor placement strategies, and routing guidelines for high-speed interfaces. Simulating power integrity (PI) and signal integrity (SI) using tools like HyperLynx before sending the board to fabrication can save weeks of debugging time and costly board revisions. Pay special attention to the return current paths; an uninterrupted ground plane beneath high-speed signal layers is non-negotiable.
Performance Optimization Tips
Extracting maximum performance from the XC7A35T-1CPG236C goes beyond just a working circuit. Optimization focuses on thermal, power, and signal integrity aspects.
Thermal Management: Even though Artix-7 devices are designed for low power, a densely utilized FPGA in a compact CPG236 package can generate significant heat. The primary path for heat to escape is through the BGA balls into the PCB. A matrix of thermal vias should be placed directly under the package, connecting the central ground pads of the BGA footprint to a large, solid internal ground plane. This plane acts as a heat spreader. For monitoring, the FPGA includes an internal temperature sensor accessible via the XADC block, which should be used to validate thermal performance under load.
Power Optimization: Use the Xilinx Power Estimator (XPE) spreadsheet early and often. Start with a rough estimate before writing any HDL, and refine it as the design progresses. In your HDL code, employ clock gating (`gated clock` constructs) to automatically shut off power to logic blocks that are not in use. This can dramatically reduce dynamic power consumption. In the Vivado implementation settings, explore options like "power optimization" which can restructure logic to reduce switching activity.
Signal and EMI Integrity: A clean design starts with a well-planned PCB stack-up. A minimum 6-layer board is recommended for this BGA, providing dedicated layers for signals, power, and ground. This ensures controlled impedance for critical traces and provides solid reference planes to minimize crosstalk and EMI radiation. Route clock signals with care: keep them short, avoid vias if possible, and shield them with ground traces. For external interfaces, consider adding series termination resistors to match trace impedance and reduce reflections.
Related Components and Accessories
A successful XC7A35T-1CPG236C design relies on a well-chosen ecosystem of supporting components. For power, consider regulators from the Texas Instruments TPS62xxx series for efficient switching, and the LP5907 series for low-noise LDO requirements on VCCAUX. For configuration memory, the Micron MT25QL series or Winbond W25Q series of SPI NOR Flash are industry-standard choices that are well-supported by Xilinx tools. A 50.000 MHz low-jitter crystal oscillator, such as one from the Abracon ASV series, provides a stable clock source for the MMCMs.
For debugging and programming, a JTAG header compatible with the Xilinx Platform Cable USB II is essential. For I/O expansion and prototyping, consider adding 0.1" pitch headers or high-density Samtec connectors to your PCB to bring out unused I/O pins. Finally, to get started with your design, it is crucial to secure the core component itself. Check XC7A35T-1CPG236C Inventory & Pricing to ensure availability for your project timeline.
Video Demonstration
Frequently Asked Questions (XC7A35T-1CPG236C FAQ)
How do I power the XC7A35T-1CPG236C correctly?
You must provide three main voltage rails. The core logic runs on VCCINT at a nominal 1.0V, which requires a high-current switching regulator. The auxiliary rail, VCCAUX, requires a clean 1.8V, typically supplied by an LDO. Finally, the I/O banks are powered by VCCO, which can be set from 1.2V to 3.3V depending on the external devices you need to interface with. It is critical to follow the power-on sequence specified in the datasheet: VCCINT first, then VCCAUX, and finally VCCO.
What is the best way to configure this FPGA in a standalone system?
For most embedded, non-volatile applications, the Master SPI configuration mode is the most practical choice. In this mode, the FPGA automatically acts as a SPI master upon power-up and reads its configuration bitstream from an external SPI NOR Flash memory chip. You must connect the dedicated configuration pins (CCLK, MOSI, etc.) to the flash chip and set the M[2:0] mode pins to '001' using pull-up/pull-down resistors.
Can the XC7A35T-1CPG236C directly interface with 3.3V sensors?
Yes, it can. The Artix-7 family features I/O banks that can be independently powered. To interface with a 3.3V sensor, you simply need to connect the VCCO supply for the I/O bank where the sensor is pinned out to a 3.3V rail. This will configure all the I/O buffers in that bank to be 3.3V LVCMOS compatible, allowing for a direct and seamless connection without any need for external logic level shifters.
How many DSP slices does it have and what are they for?
The XC7A35T-1CPG236C contains 90 dedicated DSP slices. These are hardened, high-performance blocks designed for mathematical operations, primarily multiply-accumulate (MAC) functions. In a data acquisition application, they are invaluable for implementing real-time digital signal processing tasks like FIR or IIR filters to clean up noisy sensor data, performing FFTs for frequency domain analysis, or building correlators to detect specific patterns in a data stream.
What are the main challenges when designing a PCB for the CPG236 package?
The primary challenge is the package's 0.5mm ball pitch. This fine pitch requires an advanced PCB fabrication process, typically with 4mil line/space rules or better. Breaking out the inner rows of BGA balls necessitates using microvias or via-in-pad technology, which adds to the PCB cost. Additionally, placing the large number of required decoupling capacitors as close as possible to the power and ground balls is a significant layout challenge that is critical for system stability.