LFE5U-85F-8BG381I Troubleshooting Guide: Common Problems and Solutions
Having issues with the LFE5U-85F-8BG381I on your board? You're not alone. As a senior hardware engineer, I've seen my share of FPGA bring-up challenges. The Lattice ECP5 series, including the LFE5U-85F-8BG381I, is a powerful and cost-effective family, but its complexity can lead to frustrating problems if not handled correctly. This guide covers the most common problems hardware engineers encounter during development and production, providing proven, step-by-step fixes based on official datasheet recommendations and extensive field experience.

Table of Contents
LFE5U-85F-8BG381I Quick Reference
Before diving into troubleshooting, let's confirm the key specifications of the part you're working with. Mismatched assumptions about the device's capabilities are a frequent source of design errors.
| Parameter | Value |
|---|---|
| FPGA Family | Lattice ECP5 |
| Logic Cells / LUTs | 84K |
| SERDES Channels | 8 channels, up to 5 Gbps |
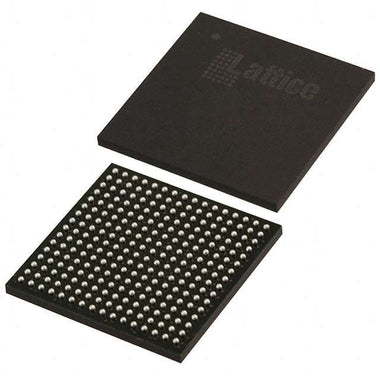
| Package | 381-ball caBGA (17x17mm) |
| Core Supply Voltage (VCC) | 1.1V (Nominal) |
| Temperature Grade | Industrial (-40°C to 100°C Junction Temperature) |
| Speed Grade | -8 (Fastest) |
The LFE5U-85F-8BG381I is a high-capacity, industrial-grade FPGA from Lattice's ECP5 family. It's engineered to deliver high-performance logic and DSP capabilities combined with fast SERDES interfaces in a compact, power-efficient package. Common applications include video processing in smart cameras, industrial motor control, communication gateways, and data aggregation in edge computing devices. Its blend of 84K LUTs, robust DSP slices, and multiple 5G SERDES channels makes it a versatile choice for bridging sensors and processors or implementing complex state machines and algorithms directly in hardware.
Common Problem #1: Configuration Failure (FPGA Not Booting)
Symptom: After power-on, the system is unresponsive. The DONE pin on the FPGA remains low, indicating that the device has not successfully loaded its configuration bitstream. JTAG access might also fail.
Root Cause: This is the most common bring-up issue. It almost always traces back to one of four areas: power supplies, configuration mode settings, the configuration source (e.g., SPI flash), or the physical interface between the FPGA and the flash.
Fix: Follow this systematic debug process. Do not skip steps.
-
Power Supply Verification: Use a multimeter and oscilloscope to verify every power rail on the FPGA. The LFE5U-85F-8BG381I requires several:
- VCC (1.1V): The core voltage. Must be stable and within the datasheet tolerance (typically ±5%). Check for excessive ripple under load with an oscilloscope.
- VCCAUX (2.5V or 3.3V): Powers auxiliary logic and some I/O buffers. Must be stable.
- VCCIOx (1.2V to 3.3V): Powers the I/O banks. Ensure each VCCIO bank powering a configuration-related pin is at the correct voltage level for your design. For example, the bank powering the SPI flash interface must match the flash's voltage.
- Configuration Mode Pins (M0, M1, M2): The ECP5 determines its configuration mode by sampling these pins at power-up. For the common Master SPI mode (booting from an attached SPI flash), the M-pins should be pulled to specific levels. Consult the ECP5 datasheet (Table "Configuration Port and Mode Selection" in the SysCONFIG Usage Guide). For Master SPI from Flash, the typical setting is M[2:0] = 001. Verify the voltage levels on these pins on your PCB. A floating pin or incorrect pull-up/pull-down resistor value is a frequent culprit.
-
Configuration Source and Interface:
- SPI Flash: Is the correct SPI flash part populated? Is it a model supported by the Lattice Diamond tools? Is it programmed with a valid bitstream file (`.jed` or `.bit` converted to a flash-programmable format)?
- Signal Integrity: Probe the SPI signals (CS_N, CCLK, MOSI, MISO) at the FPGA pins. Is there a clock on CCLK? Is the FPGA sending commands on MOSI? A "no-clock" situation often points to a power or mode pin issue. If there is activity but it looks distorted, you may have signal integrity problems (e.g., long, unterminated traces) or a drive strength mismatch.
-
Control Signals:
- PROGRAMN: This pin must be high for configuration to start. If it's held low externally, the FPGA will remain in a reset state. Check for accidental shorts to ground.
- INITN: This is an open-drain output from the FPGA. It goes low during power-up and initialization. If it stays low indefinitely, it often indicates a power supply issue detected by the FPGA's internal power-on-reset circuit.
- DONE: This pin is the ultimate indicator. It is driven high by the FPGA upon successful configuration. If it stays low, the process failed. If it "blips" high and then goes low, it could indicate a CRC error in the bitstream, often caused by noise on the SPI lines or a corrupted flash image.
Common Problem #2: SERDES Link Instability or Failure
Symptom: A high-speed serial link (e.g., PCIe, SGMII, JESD204B) fails to establish a connection (link-up fails) or exhibits a high bit error rate (BER), leading to data corruption and frequent link retraining.
Root Cause: SERDES interfaces operate at gigabit-per-second speeds and are extremely sensitive to power supply noise, clock jitter, and signal integrity imperfections on the PCB.
Fix: Debugging SERDES requires an oscilloscope with sufficient bandwidth (>10 GHz is ideal) and a meticulous approach.
-
Dedicated SERDES Power: The ECP5 SERDES transceivers have their own dedicated power supply pins (e.g., VCCA_PLL, VCC_SERDES). These are the most critical power domains for link stability.
- Noise Measurement: Probe these rails as close to the BGA balls as possible (e.g., at the decoupling capacitor). Use an oscilloscope's FFT function to analyze the noise spectrum. Any significant spurs, especially in the kHz to low-MHz range, can degrade SERDES performance. This noise often comes from nearby switching regulators.
- Decoupling and Filtering: The datasheet and application notes provide a reference decoupling and filtering scheme for these rails, often involving a ferrite bead and a capacitor network. Verify that your design implements this scheme correctly. Using the wrong type of capacitor (e.g., a high-ESR aluminum electrolytic instead of a low-ESR ceramic) or an incorrect ferrite bead can be disastrous.
-
Reference Clock (REFCLK): The SERDES PLLs multiply a lower-frequency reference clock to generate the high-speed serial clock. The quality of this REFCLK is paramount.
- Jitter: Use a high-performance oscilloscope with jitter analysis software to measure the phase jitter of the REFCLK at the FPGA's input pins. The total jitter must be within the limits specified in the ECP5 datasheet for the desired line rate. Common sources of excessive jitter are noisy clock generator ICs, poor routing of the clock signal (e.g., crossing splits in the ground plane), and improper termination.
- Signal Level and Type: Ensure the REFCLK meets the required swing and common-mode voltage for the I/O standard used (e.g., LVDS, HCSL).
-
High-Speed Differential Traces: The physical layout of the Tx and Rx pairs is non-negotiable.
- Impedance Control: The differential impedance must be tightly controlled (typically 100 ohms). Use a TDR (Time-Domain Reflectometer) to verify the impedance of your PCB traces if you suspect a manufacturing defect.
- Discontinuities: Vias, connectors, and AC-coupling capacitors all introduce impedance discontinuities that cause reflections and degrade the signal. Minimize the number of vias and use properly designed "back-drilled" vias if possible. Ensure AC-coupling caps are placed symmetrically and are of a suitable package size (e.g., 0402 or smaller).
- Eye Diagram: The ultimate test is to probe the signal at the receiver's pins and view the eye diagram. The "eye" should be wide open, with minimal closure due to jitter and noise. The ECP5's internal SERDES blocks often have built-in eye monitoring capabilities accessible via JTAG or registers, which can be invaluable for non-intrusive debugging.
Common Problem #3: Intermittent Logic Errors and System Hangs
Symptom: The FPGA configures successfully, and the system appears to work, but it experiences random failures. These can manifest as data corruption, a state machine getting "stuck," or the entire system freezing after minutes or hours of operation. These are the hardest problems to debug.
Root Cause: Intermittent failures are often caused by timing violations within the FPGA logic, or by external factors like power supply instability that only manifest under specific operating conditions (e.g., high processing load or temperature changes).
Fix: This requires a combination of static analysis and dynamic testing.
-
Static Timing Analysis (STA): This is the most important step. After synthesizing and place-and-routing your design in Lattice Diamond, you must meticulously review the timing analysis report.
- Failed Paths: The report will explicitly list any logic paths that fail to meet their timing constraints (setup and hold times). These are guaranteed to cause problems. You must fix every single one, either by restructuring the RTL code (e.g., adding pipeline stages), adjusting constraints, or trying different compiler settings. Never ship a design with known timing failures.
- Clock Domain Crossing (CDC): Signals that pass between asynchronous clock domains are a notorious source of metastability and random errors. Ensure that you have used proper CDC synchronizer circuits (e.g., two-stage flip-flops) for all such signals. Modern synthesis tools can generate CDC reports that help identify these paths. Ignore them at your peril.
-
Power Integrity Analysis: Even if the DC voltages are correct, dynamic current demands from the FPGA core can cause the VCC rail to droop momentarily. If the voltage droops below the minimum operating level, it can cause flip-flops to lose their state.
- Decoupling Capacitors: The solution is a robust network of decoupling capacitors placed as close to the FPGA as possible. This requires a mix of bulk capacitance (tens of uF) to handle low-frequency load changes and a distributed array of smaller ceramic capacitors (e.g., 0.1uF, 0.01uF) to handle high-frequency switching noise. Your PCB layout must provide a low-inductance path from these capacitors to the FPGA's power and ground pins.
- Worst-Case Testing: Create a test bitstream that activates as much of the logic and I/O as possible to create a worst-case power draw. Run this test while monitoring the VCC rail with an oscilloscope set to AC coupling and a narrow voltage scale. Look for transient voltage drops that coincide with processing activity.
-
Thermal Management: The LFE5U-85F-8BG381I is an industrial-grade part, but it still generates heat. If the junction temperature exceeds the 100°C maximum, the device's timing characteristics will change, potentially leading to timing failures that didn't appear at room temperature.
- Monitoring: Check the temperature of the device package during operation. If it's too hot to touch comfortably, you likely have a thermal issue.
- Solution: Ensure adequate airflow over the device. In high-performance applications, a heatsink may be necessary. The 381-ball BGA package is designed to dissipate heat through the PCB, so a good thermal design with thermal vias connecting the package's ground paddle to internal ground planes is critical.
Comprehensive Debug Checklist
When a board first arrives, use this checklist to methodically verify its health before attempting to load a complex design. This isolates hardware issues from firmware bugs.
| Step | Check Item | Expected Result | If Failed |
|---|---|---|---|
| 1 | Power Rail Voltages | VCC, VCCAUX, VCCIOx are all within ±5% of nominal. | Check power supply regulators, inductors, and feedback resistors. Look for shorts. |
| 2 | Power Rail Ripple | Ripple on all rails is within datasheet limits (e.g., < 30mVp-p). | Improve decoupling. Add more ceramic caps close to FPGA pins. Check for noisy VRMs. |
| 3 | PROGRAMN Pin | Pin is held high (logic '1') after power-up. | Check pull-up resistor. Check for external drivers holding it low. |
| 4 | M[2:0] Mode Pins | Pins are at the correct logic levels for the desired boot mode. | Check pull-up/pull-down resistors. Check for shorts or opens. |
| 5 | JTAG Chain | Lattice Diamond can detect the LFE5U-85F-8BG381I in the JTAG chain. | Check JTAG pod connections, signal integrity on TCK/TMS/TDI/TDO, and VCCIO for the JTAG bank. |
| 6 | Configuration Clock | Using a simple "blinky" test, CCLK shows activity during boot attempt. | If no CCLK, re-verify steps 1-4. The FPGA is not attempting to boot. |
| 7 | DONE Pin | Pin goes high after configuration completes. | If it stays low, configuration failed. If it pulses, check bitstream CRC/integrity. |
| 8 | Reference Clocks | All external clock inputs are present, stable, and have low jitter. | Check clock oscillator/generator IC, power, and signal path. |
This checklist provides a solid foundation for any FPGA debug session. If you can get a simple JTAG-based "identify" command to work and can successfully load a "blinky" LED design that toggles a pin, you have confirmed that the core hardware (power, JTAG, basic configuration) is functional. From there, you can move on to debugging more complex parts of your design, such as memory interfaces or SERDES links. Remember that the entire ECP5 family shares many of these characteristics. If you're struggling with one part, insights from other designs can be helpful. You can Browse ECP5 Series parts to see how different configurations might influence design choices for power and I/O.
Sourcing and Authenticity: Avoiding Counterfeit Parts
In today's strained supply chain, the temptation to source components from unauthorized channels is high. For complex devices like the LFE5U-85F-8BG381I, this is a significant risk. Counterfeit FPGAs are a real and damaging problem. These can range from completely non-functional dummy packages to lower-grade parts (e.g., commercial grade remarked as industrial) or used parts that have been pulled from scrap boards and re-balled. These parts will cause inexplicable failures, costing hundreds of hours in debug time.
Signs of a counterfeit or substandard part include:
- Poor Markings: Laser markings that are blurry, off-center, or use the wrong font.
- Package Finish: Inconsistent texture, signs of sanding ("blacktopping"), or residue on the BGA balls.
- BGA Ball Condition: Unevenly sized or oxidized solder balls, indicating a re-balling process.
- Unusually Low Price: If a price from a broker seems too good to be true, it almost certainly is.
The only way to be certain you are receiving a genuine, factory-new LFE5U-85F-8BG381I is to source from a trusted and traceable distributor. A reliable distributor maintains a transparent supply chain, provides date codes and lot information, and has quality control processes to detect and reject suspect parts. Wasting weeks debugging a counterfeit part can easily cost more than the perceived savings from buying from a questionable source. Protect your project, your timeline, and your sanity by sourcing responsibly. You can Check LFE5U-85F-8BG381I Inventory & Pricing through our secure supply chain to ensure you receive authentic components.
Video Demonstration
Frequently Asked Questions (LFE5U-85F-8BG381I FAQ)
Why isn't my LFE5U-85F-8BG381I booting up from SPI flash?
This is the most common issue. First, verify all power rails (VCC, VCCAUX, VCCIO) are stable and at their correct voltages. Second, check the configuration mode pins (M0, M1, M2) to ensure they are correctly strapped for Master SPI mode. Finally, probe the SPI interface itself: ensure the SPI flash is programmed, compatible, and that you see activity on the CCLK and MOSI lines during the boot attempt.
What causes the DONE pin to stay low after power-on?
The DONE pin remaining low means the FPGA has not successfully completed its configuration. This can be due to a hardware issue like incorrect power, wrong mode settings, or a broken SPI/JTAG connection. It can also be a software/firmware issue, such as a corrupted bitstream file in the flash memory, or a bitstream generated for a different FPGA part or speed grade. A quick pulse on DONE followed by it going low often points to a CRC error during bitstream validation.
How do I verify the JTAG chain is working correctly?
The simplest way is to use the Lattice Diamond programmer tool or a third-party tool like OpenOCD. Connect your JTAG programmer (e.g., a Lattice USB programmer) to the board's JTAG header and attempt to "detect" the device chain. If the tool successfully identifies the LFE5U-85F-8BG381I, your JTAG chain is likely functional. If it fails, check the TCK, TMS, TDI, TDO, and GND connections, and ensure the VCCIO for the JTAG bank is powered correctly.
My SERDES link has a high bit error rate (BER). What should I check first?
For high BER on a SERDES link, start with the two most likely culprits: power and clocks. Use an oscilloscope to check for noise and ripple on the dedicated SERDES analog power rails (VCCA_PLL, VCC_SERDES). Then, measure the phase jitter on the SERDES reference clock (REFCLK) at the FPGA input pins; it must be within the datasheet specification. If power and clocks are clean, investigate the PCB layout for signal integrity issues like impedance mismatches or excessive via stubs.
Can I use a different speed grade SPI flash for configuration?
Yes, but with caution. The ECP5's configuration controller can operate the SPI clock (CCLK) at various frequencies. While you can often use a faster or slower SPI flash than specified, you must ensure the CCLK frequency set in your design's bitstream properties does not exceed the maximum clock frequency of the specific flash chip you are using. Using a CCLK frequency that is too high for the flash is a common cause of configuration failure.